
 |
| 1940's Stearman Biplane |
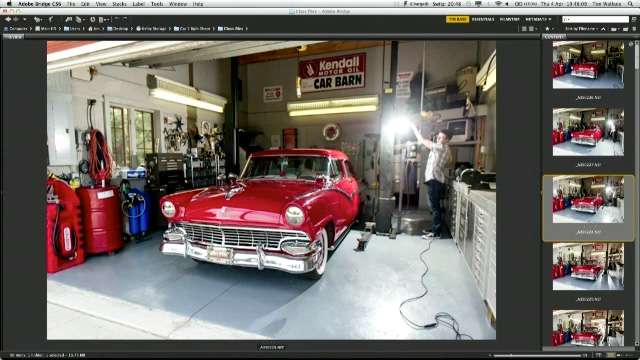 |
| Screen Shot of Tim Wallace's lighting video on KelbyTraining.com |
Here's what I did, following Tim's recipe with a description of the gear used.


The first thing in the way of gear that bears mention is the Kasey Enterprises pole adapter (Above & Left) which I picked up at the Orlando Photoshop World Expo in the spring but which you can order online. I discovered this little gem while attending +Joe McNally's Pre-Con workshop when his assistant busted this thing out attached to a paint roller extension pole. The pole was used as a hand held "light stand" for a hot shoe strobe bracket, three SB-800 strobes, and a 7' parabolic shoot-through umbrella. Joe mentioned that this gizmo was now standard equipment for him and after an afternoon of shooting with this thing I was sold.
 The adapter allows you to convert a paint roller extension pole into a hand held light stand onto which you can attach a studio strobe or a hot shoe strobe mount. The Kacey adapter simply screws onto the end of the paint roller extension pole. You probably already have a paint roller extension pole around the house but if not, Lowe's, Home Depot, Walmart and Ace hardware have an extensive selection of poles in a variety of lengths. I elected to go with a Wooster 4' to 8' pole from Lowe's ($25) because it's extremely sturdy, it's light weight, and it has a thumb release locking mechanism which allows you to extend the pole in 6" increments and then it locks the extension pole in place. I prefer this mechanism to the more typical twist type of locking mechanism as it is more secure and much easier to use when trying to extend the extension pole (especially when using something as large as a 7' parabolic umbrellas as light modifiers which I bought at the Expo as well).
For the aircraft shoot, I attached one of my hot shoe strobe mounts to the end of the Kacey adapter and then mounted an SB-800 with its diffuser on the strobe mount.
The Wallace one-strobe method requires a tripod for the camera, a remote camera trigger, and a remote strobe triggering method. I set up my camera on a tripod with a 17-35mm f2.8 lens as low as the tripod would permit so I could shoot up at the Stearman. This is one of many tips I picked from +Moose Peterson's +KelbyTraining.com video on aviation photography. Moose's video is a great resource for getting started in this genre of photography as Moose is the man when it comes to aircraft photography. As soon as I found out I would have access to the museum's aircraft, I made it a point to watch Moose's video. Until now, I had never spent any time shooting planes and who better to walk me through that minefield than Moose?
I used a couple of Pocket Wizards as the remote camera trigger by attaching one to the tripod and running a cable from the Pocket Wizard to the camera's remote input and set the second Pocket Wizard to transmit. I used my SB-800 Commander to remotely trigger the SB-800 so that every time the Pocket Wizard triggered the shutter, the SB-800 would trigger the flash.
 |
| Stearman "base' image |


The next step in Tim's method involves walking around the subject (in his case, the car, in mine, the aircraft) with the strobe mounted paint roller pole and remotely triggering the camera/strobe from numerous positions (as shown above). I used a camera setting of f5.6 @ISO 200 and 1/60th second. Tim suggests that you shoot as many of these images as you can, some of which will end up being used and some of which will not, but you won't know which you will use until you start processing. Since you can never recreate the "base" image after the camera is taken down from the tripod, Tim is adamant about taking as many images as you can, including a few with the flash bounced off the ceiling. He also encourages a few shots of background and floor portions of the scene being lit up by the strobe.
By moving around and pointing the strobe at various parts of the subject and scene, you create highlighted parts in each frame you shoot. These areas are flooded with light from the strobe while all other areas remain unlit. With the camera in one stationary position the entire time you are shooting, it's a piece of cake to subsequently layer in the "lit" portions of the images that you get in the different frames as you see fit.
For the sake of comparison, here are my two images, in sequence - the first is the "base" image which depicts what the image would have looked like without augmentation by Tim's method. The second is the finished product after selecting and layering in various highlighted portions and then adding some post processing techniques which I learned from watching +Moose Peterson's Kelby Training video on how to shoot sircraft.


Tim's technique is a great one for those occasions when you only have only one strobe at your disposal and want to create a uniquely lit image of a large subject. It's also a great method even if you have multiple strobes at your disposal but choose not to use them. I intend to continue exploring Tim's method in other settings and am grateful to him for giving me another trick to have in my back pocket. And of course my hat's off to Moose for giving me the foundation from which to use Tim's method.
No comments:
Post a Comment