Showing posts with label automobile photography. Show all posts

Wednesday, May 29, 2013

My New Website May Become A Squarespace Featured Site


After a month of eye fatiguing image searches through countless hard drives; hours of font selection, color changes, design tweaking and image processing; naming and renaming image galleries; uploading, arranging and deleting images; and scrambling to take the site live, I was finally satisfied with the way my new website looked. I'm still in the process of messing with it some - for example, I will be adding a new image gallery (Hot Wheels) once I have enough quality car (and possibly motorcycle?) images to display - but the overall framework and look is a done deal.

The entire time I was going through the design process, I did my best to resist my inner impulses and deviate from the original concept - keep the site simple and tasteful. Somehow, I managed to keep my demons in check and the final product seems to have achieved the goal.

I've been contacted by Squarespace and advised my website has been submitted for consideration as one of their Featured Sites using the Wells template. Apparently some of the images in my galleries, as well as my design tweaks to the template, caught their attention and it is being considered for addition to the Featured Site list. As a Featured Site,  Squarespace visitors wishing to see a website designed with the Wells template would click on the "See Example Site" link and portions of my site would pop up for viewing. Very cool.

Still Messing Around With Cars...

As I continue to explore the nuances of automobile photography, I thought it was time to take the next step and migrate from shooting just the details of vehicles to creating images that depict the entire vehicle. I used a 2007 Ferrari 599GTB as the subject for the images below which include one detail shot and a full length shot of the car. It's still an ongoing, learning process, but I'm thoroughly enjoying the learning process as I explore a whole new aspect of photography.


One of the things I decided to try for the first time was using some HDR processing in the creation of  the full length car image (as you can see in the first image above). I think the HDR look really kicks tush with car images and now I just have to experiment with it to come up with images that use the technique in a flattering manner.

Beisbol Still Bein' Berry Berry Good To Me


With Florida State having selected as one of the top 8 National Seeds for the upcoming NCAA Baseball Tournament, the Seminoles will be hosting one of the Regionals this weekend. If FSU wins the Regional, it will also host the ensuing Super Regional, the winner of which would advance to the College World Series in Omaha. The teams taking part in the FSU Regional are FSU, Alabama, Troy and Savannah State.

I've been assigned to shoot Saturday's FSU game, which will either be the late game in the winner's bracket or the earlier game in the loser's bracket depending on whether FSU wins its opening game Friday against Savannah State. I'm also set to shoot the Coaches' press conference scheduled for Thursday afternoon. I was not scheduled to shoot any opening day games on Friday, but late yesterday I was contacted by Troy's Sports Information Director and asked if I was available to shoot their game against Alabama. I've quoted Troy my fee for shooting the game and it's being run up the Troy Athletics flagpole since it is a bit higher than their SID is authorized to pay. If they're willing to pay my standard rate, looks like I'll be shooting for Troy on Friday. I'm supposed to hear back today.


Monday, May 27, 2013

Hot Wheels

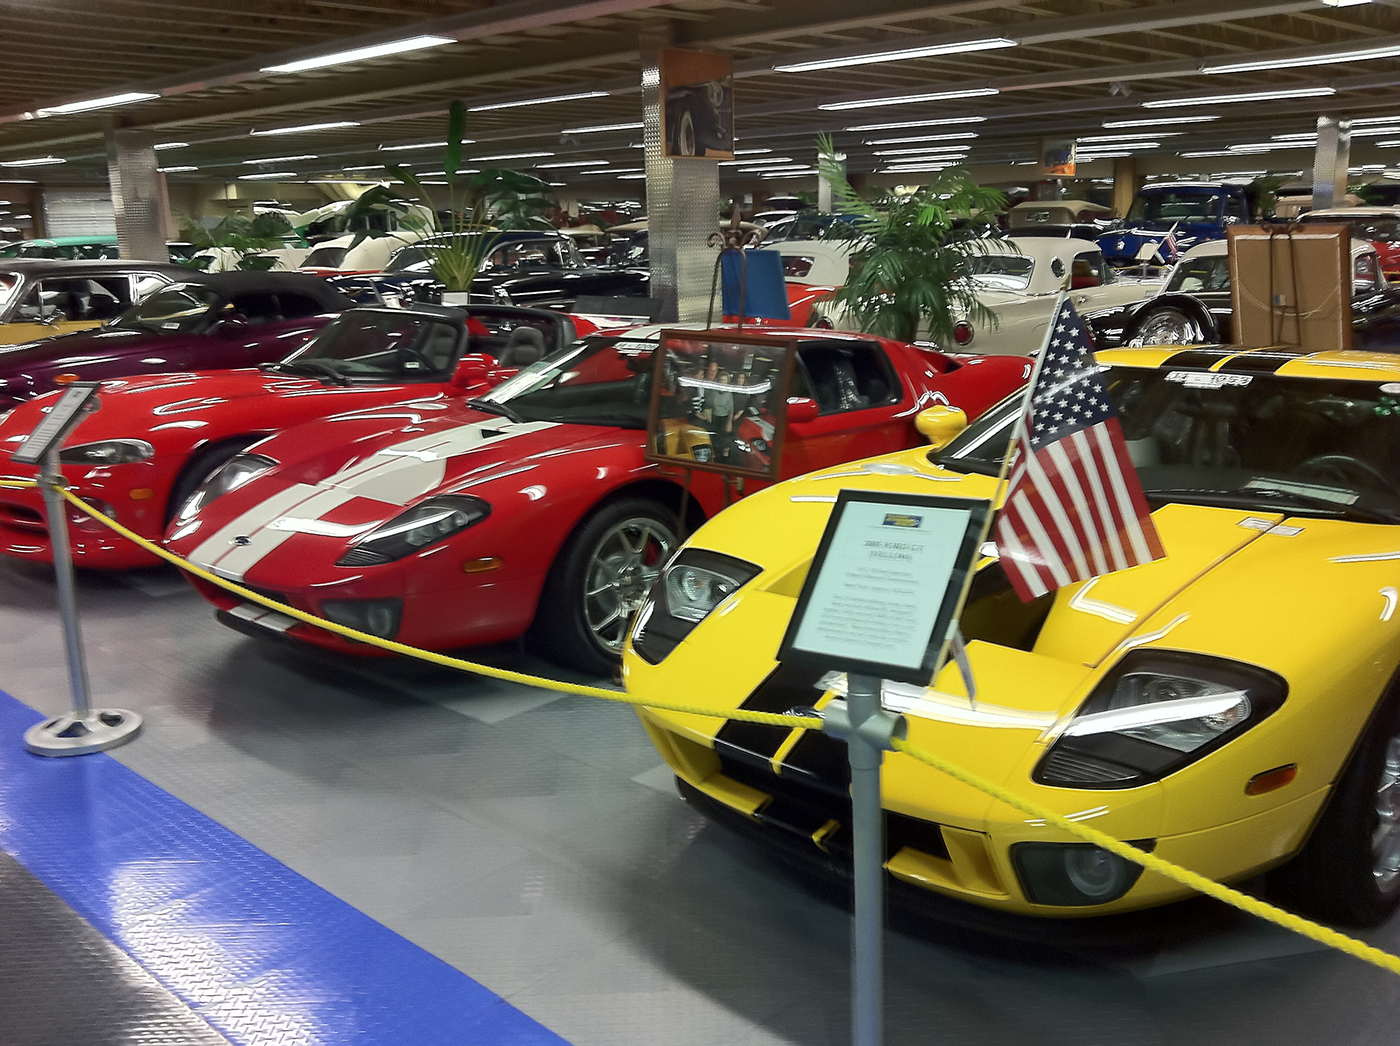
iPhone shot - 3 of Bill Elliott's NASCAR cars, including the 1987 Coors T-Bird that won the Daytona 500 in 1987 (R)

On Friday, as I was trying to decide what camera gear to load into the car before beginning the drive up to our cabin in the North Georgia mountains for the Memorial Day weekend, I debated whether to bring any of my hot shoe strobes, light stands and soft boxes. From experience, I know that during Holiday weekends, there are a bunch of car shows and street rod rallies within easy driving distance and I thought it would be a great opportunity to continue becoming familiar with the hot shoe gear as I also continue to develop my skills shooting autos. Little did I know that fate was knocking on my door.

In the end, I decided to cram the stuff in the back of the spousal unit's Touareg despite knowing that it would take all the room in the rear cargo area. That would leave no room for anything else, but since we have everything we need at the cabin in the way of clothes, etc., we never take much of anything so the space was not needed for luggage or other items. What the heck, said I. I'll take the stuff just in case.

iPhone shot depicting just a few of the other stock cars inside the GRHOF Museum
Am I glad I did. Friday evening, I began searching the web for car Saturday car shows and discovered that the Georgia Racing Hall of Fame in Dawsonville, GA was not only having its induction ceremony for the 2013 Hall of Fame Class, it was hosting a fairly large car show. Dawsonville is home to NASCAR great Bill Elliott, and the HOF Museum which is located on the grounds includes several of Elliott's NASCAR rides along with many other stock cars from various eras. After a few calls to a friend of a friend of a friend, I secured permission to not only shoot any of the cars inside the museum, but I was also given permission to move any of the barricades as I wished to allow me better access to the cars. Yowsa. I had hoped to be able to shoot a few street rods. Here was a rare opportunity to get up close and personal with some NASCAR raced stock cars.

The spousal unit dropped me off at the Museum at noon and gave me until 5:00 p.m. to do my thing. She was content to head into nearby Dahlonega to shop, leaving me ample time to play with the cars.

Front of Elliott's 1987 Coors Ford Thunderbird
Because I'm still waiting for the rest of the lighting gear I ordered to arrive, I only had one 13X56 strip softbox to go with a 10X36 box. That meant having to be a little creative with the lighting setups as the two softboxes would not produce the same lighting when used together, e.g., on either side of a car. Oh well, you dance with the one who brung you. I brought 4 light stands and all of my hot shoe strobes, so from that perspective I was OK. In the end, the different sized softboxes were made to work.


Before beginning to shoot, I came to grips with the fact that time would only permit me to shoot just so many cars so I had to decide which ones to photograph. I decided on three - Elliott's 1987 Daytona 500 winning Coors T-Bird, his 1992 Budweiser T-Bird, and his 2000 McDonald's Taurus. Because of how Dale Earnhardt's  1990 Daytona 500 Chevy (the year he led most of the race before spinning out on lap 193 with a 40-second lead) is displayed behind fixed barricades, it would just have to wait until another visit to the Museum. The Museum folks told me that next time, if I call ahead, they may just be able to bring the vehicle out from behind it's barricades for me. Aw, yeah.

Elliott's 1992 Budweiser T-Bird
I spent the day moving barricades, positioning lights, shooting, adjusting the lights, shooting some more, replacing the barricades, dodging museum visitors, and taking a peek at my images as I methodically moved from the front of the three cars I selected as my guinea pigs to the rear. Using what little I know about shooting cars, I tried several different angles of the front, wheels, sides and rear end before moving to the next vehicle.


Front and Rear of Elliott's 2000 McDonald's Ford Taurus
I shot at 1/250th second, ISO 200 and f22. On some shots, I used both strip lights but on some I only used one, depending on whether I wanted dramatic shadows or whether I wanted more even lighting. To see other images of the stock cars, head over to the photo gallery I posted on my Google+ page.


I was actually finished shooting Elliott's cars before 5:00 pm, which gave me time to seek out other possible subjects. An old 1928 black stock car caught my eye and after a few minutes, I was all set up to shoot this bad boy. Then I found a 1957 Chevy, a 1956 Ford, and a Pink Caddy with glorious fins in one of the exhibits. Moving to that room, I finished up my day with the images below, the icing on my photographic cake.


I'm looking forward to a return trip to the museum for more images of some of the cars housed within its walls. But for now, suffice it to say that I'm sooooooo glad I decided to go to the trouble of hauling the lighting equipment up to the cabin. Having a chance to photograph cars like these does not come along every day and I'm tickled to death that I was able to take advantage of the opportunity.

Friday, May 24, 2013

Challenges Can Lead To Opportunity

Nose of the Batman Returns Batmobile
After two trial runs to get some practice with my assortment of hot shoe flash gear and experiment with car photography, I thought it was time to take the show on the road and really test myself. It's one thing to go through practice runs in a no-pressure environment like one's driveway, not to mention having had the freedom to stage shots any way I wanted. It's a whole different ballgame when you tackle lighting and shooting something that presents the Mt. Everest of challenges - a subject that is entirely black, virtually devoid of any features defined by color or shading; situated in a confined area with a host of obstacles that prevent staging and interfere with light placement; and a limited amount of time to shoot. Such was the case yesterday morning when I couldn't resist the siren's call and headed to the Tallahassee Antique Car Museum and shoot the Batmobile from the movie Batman Returns.


The museum has three Batmobiles - the original one from the TV series, the one from the movie Batman Forever starring Val Kilmer, and the one from Batman Returns with Michael Keaton as the Bat Guy. All three vehicles are displayed in a barricaded area that includes the three Batmobiles, the Penguin's (Danny Devito's version) Duck vehicle, several Batman and Robin mannequins, plus a host of other Batman movie and TV show paraphernalia. 


I had never visited the Batman vehicle display at the museum before yesterday nor had I ever paid any real attention to what the Batman Returns Batmobile looked like (I saw the movie in 1992 and the last thing on my mind was to scrutinize the vehicle's design) so I had no idea what to expect. Since it was going to be nothing more than yet another practice exercise, how bad could it possibly be to shoot this thing, or so I thought.


I had obtained permission from the museum owner to photograph his vehicles at my convenience a few weeks ago when I decided to move forward with my my automobile photography project knowing that in addition to the Batmobiles, the museum housed a comprehensive, immaculate collection of American automobiles starting with some of the very first U.S. cars up through their more recent counterparts. Rare, classic examples from every vintage abound. It's a cornucopia of photographic opportunities so I made prior contact and secured permission to shoot. As it turned out, choosing the Batman Returns Batmobile as a guinea pig was a monumental challenge to my lighting skills under the worst of circumstances.

Rear fin and cowl
When facing defeat, it's best to simply admit it and hopefully learn from the experience. In this case, the car won. It got the best of me, no matter what I tried. Trying to place the lights where I needed them to be placed was either impossible or at the very least a time consuming process that involved a host of gymnastic maneuvers to avoid hitting any the memorabilia around the car, or worse yet, smacking the car with a light stand. In the end, I resigned myself to the fact that trying to light an entirely black subject with absolutely no defining shades, highlights or color kicked my rear end. 

Side detail
I tried everything I could think of to light up the vehicle using two strobes, a 10"X36" strip softbox, and a 13"X56" softbox but nothing worked. In hindsight, I should have tried something else, i.e. adding a third light to the mix, possibly a strobe with a small umbrella reflector and a grid pointed straight at the subject area like the nose or rear fin of the car. Something like that might just have been the ticket to bring out more of the car's details but this didn't dawn on me until after I had a chance to download the card and review what I got.

Cockpit
The only image that came out even remotely close to my satisfaction was a shot of the steering wheel/cockpit depicting the gauges, knobs, lights and shifter. At least the cockpit had some color and shading differences that provided some definition to the features.

Front of original Batmobile
After exhausting almost all of my self allotted shooting time and thinking that I was going to have nothing to show for the time and effort devoted to the exercise, I decided to try my hand at getting a couple of shots of the original Batmobile which contains some red trim and some chrome/metal features that I hoped would provide just enough definition to the vehicle's lines such that it would yield something positive out of the shoot. I set up the lights as fast as I could and took a couple of quick shots of the front, the rear, and one of the wheels.

Rear of original Batmobile
Wheel of original Batmobile
After downloading the card, I began to regret having spent so much time on the Batman Returns vehicle. I was almost to the point of convincing myself that I should have started with the original Batmobile and shot the living crap out of it instead trying to bite off more than I could chew with the other one. The original Batmobile obviously lends itself much better to images - at least with my limited, developing lighting skills. But then I thought, hey, if you can tackle the worst case scenario and learn from it, it's never a waste of time.

1929 Auburn Boat Tail Speedster
Then my day improved dramatically. After packing up my stuff and stopping by to thank the owner for the chance to shoot the vehicles, he asked if he could see some of the images. Not real crazy about the Batman Returns Batmobile images, I showed him the ones of the original Batmobile on my camera screen which I felt were somewhat better. He then surprised me by asking me if I had a few minutes to talk. He said he knew my work (I have had the pleasure of photographing him and his wife on several prior occasions for magazine articles and a cover), really liked the artistic look of the images, and wondered if I would be interested in working with him on a book he wanted to publish - a photo book detailing the history of the American automobile - using the museum's cars as the subjects. It would involve me coming out to the museum as time permits to photograph a list of vehicles he wants to feature in the book. If I was interested, he wanted me to do all the photography.

Tucker

Hmmmmm. Let's see. A chance to photograph some of the best examples of American automobiles in a pristine setting and with the vehicles moved into positions which will lend themselves to easier shooting? And, I almost forgot, getting paid to do it? Duh. I hope to receive the list of cars in the near future and it would seem that I will be spending a lot of time at the museum this summer. 

What started out as desire to learn how to use my hot shoe strobe gear coupled with a personal mission to dabble in automobile photography has now grown into a book project which will feature my images. Not bad for a day that started out with an unexpected challenge that morphed into a great opportunity.

Wednesday, May 22, 2013

No Substitute For Hands On Practice

2007 Hummer H2, from yesterday's practice photo shoot
There's no getting around the fact that when you take the plunge into a new aspect of photography there is going to be a steep learning curve. Watching instructional videos, reading books, and taking advantage of other such sources are a good way to gain basic knowledge as to techniques. But, there's no substitute for hands on experience, especially when it comes to becoming intimately familiar with your gear.

When I first decided to try my hand at studio photography a few years ago, I amassed the equipment that I felt I would need after learning the basics from sources such as the ones mentioned above. I then bought a mannequin and tried a variety of lighting setups to see for myself what each light modifier would do, by itself and in conjunction with others, at various angles and positions. I experimented, tested, and played around until I had a good idea of how to use the equipment. The hands on knowledge I gained was invaluable as I moved on to shooting living, breathing subjects.

When I recently decided to venture into the world of hot shoe lighting, I saw no reason to do anything but follow the same road map I used for learning how to use studio lighting. I have been putting together an assortment of gear that will allow me to shoot just about anything on location, away from the studio. With that process almost complete, the time finally came to take the next step - actually using the equipment to become familiar with its nuances. With two practice shoots under my belt now, I've made some huge strides on the learning front. I also discovered an unexpected problem that I have been able to solve thanks to having taken the time to familiarize myself with the gear in a practice setting.


Nikon's SB-800 is a great strobe and for a long time it was my go-to strobe. Nikon gave users the option of using 4 AA batteries to power the unit, but by replacing the standard battery door cover with a "Quick Recycling Battery Pack" (shown installed, above, on the left side of the strobe), an additional AA battery gave the strobe quicker recycling time and some additional flashes before the batteries required replacement. From the moment I unboxed my first SB-800, I removed the standard door (shown above to the right of the strobe) and attached the extra battery pack. Until literally 5 minutes ago, I had no idea what I did with the standard door (it's been several years since I installed the battery pack, after all, and I never had a reason NOT to use the battery pack so the door was superfluous), but in a brief moment of lucidity, I remembered where I put the door and found it. The importance of this will be readily apparent in a minute.

Knowing that the SB-800 is a great strobe, I acquired two additional (used) units for use in my hot shoe lighting kit to go with an SB-600, an SB-900 and an older SB-28 that isn't compatible with certain aspects of Nikon's Creative Light System but will still be useful for certain things. Both SB-800 units arrived with the battery packs attached and no standard door. At the time I thought it was no biggie, and was actually happy that the used strobes cam with the extra battery capacity.


Here's the problem that I discovered. In order for Nikon's CLS-compatible strobes to fire wirelessly using the CLS system (as opposed to triggering the strobes in Manual Mode with, e.g. Pocket Wizards), an infrared light beam is emitted from a camera mounted transmitter (the Commander, in CLS jargon). A Commander can be an SU-800 Commander, an SB-800 strobe, an SB-900 strobe, or the newest Nikon strobe, the SB-910 (note: Nikon's SB-600 does not have Commander capability). Each CLS strobe is equipped with two light sensors - one that senses the Commander-transmitted infrared beam (the TTL Wireless sensor shown above), and another which triggers the flash when the strobe is used in non-TTL mode (basically, this is nothing more than an old school slave sensor which causes the flash to trigger when the sensor "sees" another flash's flash).


During my two "practice" car shoots earlier this week, when I used the SB-800's in the "remote" mode with the battery pack attached, the protruding battery pack blocked the TTL Wireless Sensor from "seeing" the infrared light beam transmitted by the Commander unit every time I positioned the strobe(s) behind my shooting position. No see-y, no-flash-y. No flash-y, huge aggravation. That forced me to always position the strobes ahead of my shooting position or risk that they would not fire. Whenever I unwittingly moved too far in front of the strobes (looking at the image above, anywhere forward of the right light stand's forward leg), no flash. Thus, I was unable to position the strobe(s) exactly where I wanted which yielded lighting that I had to settle for instead of lighting that I wanted to create. 

I have found replacement, standard battery doors on line (amazingly, none of my usual sources for new equipment - B&H and Adorama - stock them) for the two SB-800's that did not come with the standard battery door and they are on the way. Once they arrive, the problem will be solved but I am so very glad I had this issue come up while practicing with the equipment instead of discovering it when shooting something other than a practice/personal project.


So how did I do at my second attempt to learn the ins and outs of automobile photography despite the SB-800 issue? I'm still blown away by what you can accomplish with hot shoe strobes and fairly minimalistic lighting. Using one (but sometimes two) 9"X36" inexpensive strip softboxes, a couple of flash brackets, light stands and SB-800's triggered by am SU-800 Commander, you can see the results and judge for yourself.


After two trial runs, I know I still have much to learn in terms of light placement. After the shoot, as I was processing the images, I made mental notes as to where I had positioned the lights for any given shot. Going back to the instructional videos to see exactly how others positioned their lights for similar shots, I noticed that my lighting locations were off - for one thing, way too far away from the area I was trying to light. That's easily corrected, and hopefully next time out, my lighting will be much improved. Without having taken the time to practice, though, I would have made the mistake with a lot more than a personal practice project on the line.


I'm anxiously looking forward to the arrival of the two 12"X56" softboxes that I ordered for car photography opportunities as those are much better suited for the job. They should be here any day and as soon as they arrive I'll put them to the test and compare them to the 9"X36" baby brothers. I'm debating whether to wait for their arrival before taking things up a notch and shooting a couple of vehicles that I've been frothing at the mouth to shoot - a couple of original Batmobiles in impeccable condition - or throw caution to the wind and do what I can with the smaller softboxes. Only time will tell....

Monday, May 20, 2013

It's All In The Details


I love cars. Always have and always will. There's just something about a bad ride that makes me drool. So what better way to combine something else I love (photography) than by shooting photos of cars?


I've been reading posts by +Scott Kelby over the past couple of years as he has dabbled in some car photography after hooking up with +Tim Wallace, a UK based automobile photographer. Scott is a car nut too and just as it is for me, combining two things he loves (photography & cars) is just too cool for school. It was just a matter of time before Scottie took the plunge into car photography, but I am so glad he did because when he gets into any aspect of photography, you can expect him to seek out the best of the best in the field and have him or her provide the rest of us with the road map to successful shooting. Every time I decide to dabble in a new aspect of photography, I know I can go to +KelbyTraining.com  and there will be insightful, helpful video tutorials on how to do just about anything. Shooting cars was no exception.


Scott had Tim create some videos for Kelby Training on the ins and outs of shooting cars.  I watched three of Tim's videos and I was soooooo hooked as I drooled over some of the images that one might create with Tim's method. I was chomping at the bit to shoot some cars, but the problem was equipment. In order to shoot cars a la Wallace, studio (as in artificial) lighting is essential. I have studio lights (monolights) but they're not very portable and they require AC power. For us mere mortals who don't make a living at shooting stuff on location, having portable power packs/strobes on top of everything else is just not in the cards.


That's where for me, hot shoe lighting is the ticket. I've been putting a portable, serviceable, location lighting kit together using hot shoe strobes as the foundation for about a year or so. For the every-now-and-then location shoot that requires lighting, I felt like this was all I needed and it wouldn't break the bank. As hot shoe strobes have become increasingly more versatile and powerful, they have become a viable lighting option, indoors and outdoors, for a lot of people; and when folks are willing to spend money, all the necessary equipment suddenly becomes affordable as knock off gear is mass produced. Can I get an Amen for knock off gear?


All of the car images in this post were shot with one (and on a couple of images, two) Nikon SB-800 strobes which you can pick up in used, great condition for $250. Most photographers have at least one high end strobe like the SB-800 in their camera bag so a lot of the shots I got would be possible for most everyone without dropping a wad of cash on gear. The strobes are mounted on inexpensive hot shoe flash brackets (depicted above) designed to accommodate light modifiers such as softboxes and beauty dishes. The best part is you can buy them all day long for $30.

The mounting system for light modifiers is the Bowens system (L, with three protruding tabs) so the only thing to which you need to pay attention is that your light modifiers have Bowens mounts. Bowens-mount beauty dishes and softbox speedrings are probably the most universal of them all and thus it's easy to find light modifiers that will work. I wish the flash brackets came with the Photogenic mounting system as all but one of my studio monolights are Photogenics. Unfortunately, they don't. If they did, I would have a plethora of Photogenic-based light modifiers at my disposal and could use any of them with the hot shoe strobes at a moment's notice. Fortunately, I have one Bowens moonlight and because of that, I already own an 18" Bowens-mount beauty dish with grids and diffuser plus two Bowens speed rings for softboxes. In a pinch, I can use any of my softboxes with the hot shoe strobes by changing out the speed rings, a bit of a pain but an option if need be.

For detail car shots, a strip softbox is the secret ingredient. You can easily drop a couple of hundred bucks on a strip softbox if you go with a hoity toity name brand but I'm just not a hoity toity kind of guy when it comes to gear that will only get sporadic use. For me, something serviceable that will accomplish my needs without the Gucci label is just fine, especially if there's no difference in the quality of light. While at Photoshop World, I asked Joe McNally if there was any difference in the quality of light between expensive softboxes and the Chinese made versions and he said no, not really. He did say that the expensive ones are made better, will last longer, and are built to withstand the abuse of constant take down and setup, but since I don't intend to use my portable equipment very often, if I can save a few bucks, I am down with a $50 version instead of a $200 one. I bought two $50 9"X36" strip softboxes (with grids that I did not use in the shoot) and used them in all the car images you see above. So much for not having the Gucci label on the boxes.


The last piece of gear I used to do the shoot was a Nikon SU-800 Commander unit which was the camera mounted trigger for the SB-800 strobe(s). This is where cost cutting can mean the difference between getting shots and a very frustrating experience of intermittent flash firing. A reliable trigger that consistently fires the strobe(s) means the difference between your strobe(s) firing and not firing, especially when you shoot outdoors in broad daylight.  Cheap infrared triggers or wireless poppers (aka, "Chinese" poppers) are readily available and tempting, given the cost, but they're a waste of money. The cheap infrared ones are useless in daylight (the infrared light beam is too weak to overcome daylight so the strobes don't sense it) and the Chinese poppers may work once or twice (if at all) but give them time and I'm told they will crap out on you when you least expect it.

Other than the SU-800 (or using a strobe with a Commander feature like another SB-800), I would go with Pocket Wizards as flash triggers. I chose to use the SU-800 (instead of Pocket Wizards) so I could take full advantage of Ninon's Creative Light System (CLS) which includes strobes like the SB-800 and a trigger like the SU-800. CLS allows me to adjust exposures by up to three stops up or down by just pushing buttons on the SU-800 instead of having to adjust light output  manually on the strobe units. When shooting with just one strobe, not a big deal; when shooting with multiple strobes, it sure is nice to be able to fine tune the amount of light generated by the strobes without having to do anything but push a button on a camera mounted device.

Technical Exposure Details

Tim Wallace's method incudes shooting at f22. Trust me, the man knows his stuff. If you want the huge light dropoff that yields the dramatic, dark shadows with nothing lit except whatever the light modifier(s) are illuminating, you have to be at f22.

When I first set out to shoot, I grabbed my 85mm f1.8 lens that I frequently use in the studio. It has a max aperture of f16 and I thought it would be no big deal - f16 and f22? What's the big deal? Hah. At f16, enough light spilled over to light the areas around the fenders, hood, rear, etc. in the images. The images did not look like the ones I saw in Tim's videos.

After the initial, disappointing test shots, I changed out lenses to a 35-70mm f2.8 lens that was capable of going to f22. Voila. Literally and figuratively a night and day difference. For all practical purposes, the car images above required no shadow darkening in order to create the dark, dramatic lighting. That was pretty much straight out of the camera when using f22 as my aperture.

I also used a 1/200th second shutter speed, ISO 200, and shot with the lens at 70mm which is in the focal length range Tim recommends for detail car shots.

Next Up

Now that my first car shoot is over (note: I completely forgot to shoot the engine...rats) the next step for me is to take the car to a covered parking garage or other cool looking outdoor location to get some full length shots  of my baby. For this, I will need to use larger strip softboxes and multiple strobes. In a parking garage or indoor warehouse setting, Tim Wallace's method employs 4 lights and two large strip softboxes. Rather than take the larger soft boxes I have from the studio, I found some 12"X56" strip boxes sold by ePhoto.com for $60 and the price includes the $30 hot shoe bracket and grids. Two are  already on the way as you can't shake a stick at the price. I realize that Tim uses somewhat larger strip boxes when shooting his full length car images but he's powering them with 1600 w/sec flash heads and I'm limited to hot shoe strobes.  It will be interesting to see if an SB-800 can light up the 12"X56"softbox and put out enough light for use at f22 but I think they can, I hope they can.

All in all, I was ecstatic to walk away from my first foray into detail car photography with the shots that I got. As with any kind of photography, the more you do it, the better you get so I'm hoping I can improve on what I got as I shoot more cars. Yesterday's exercise accomplished several things, though: 1) I got to try out the portable, hot shoe gear I've been acquiring in a no-pressure situation; 2) I learned a lot through trial and error on where/how to place the lights; and 3) I got a shoot under my belt in preparation for shooting some ultra cool cars for which I will have access.