 |
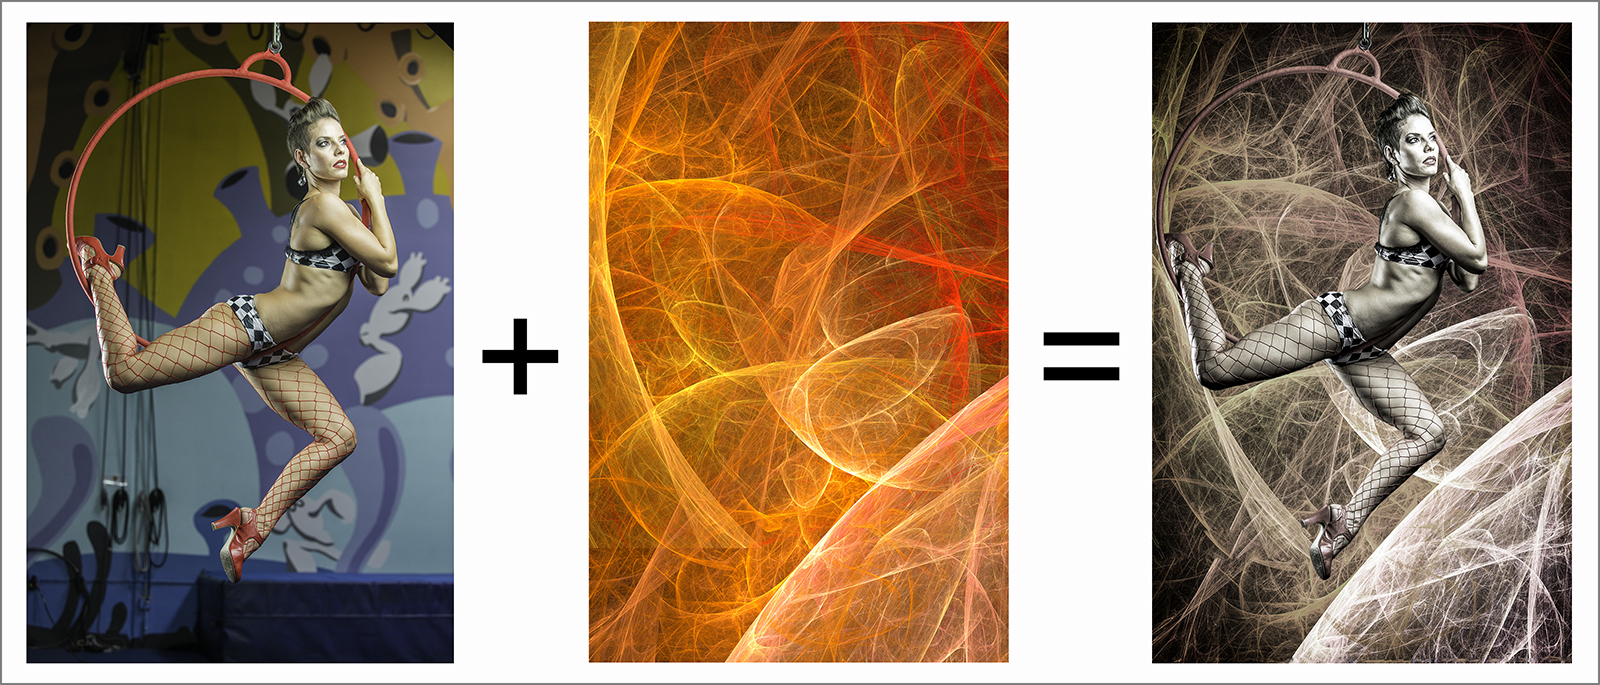
| An example of a recent composite I created by "cutting out" the model and layering her into a different background |
A few years ago, I saw some of Joel Grimes' work for the first time. I was blown away. The final images he created by taking one image, cutting a portion out, layering it into a different background, and then adding his unique processing techniques, made my jaw drop. The more of his work that I saw the more I knew that I had to learn how to create composite images. I reconciled myself to the fact that I wasn't going to create anything remotely approaching the level that he had reached, but I had to start from scratch and gradually improve with practice.
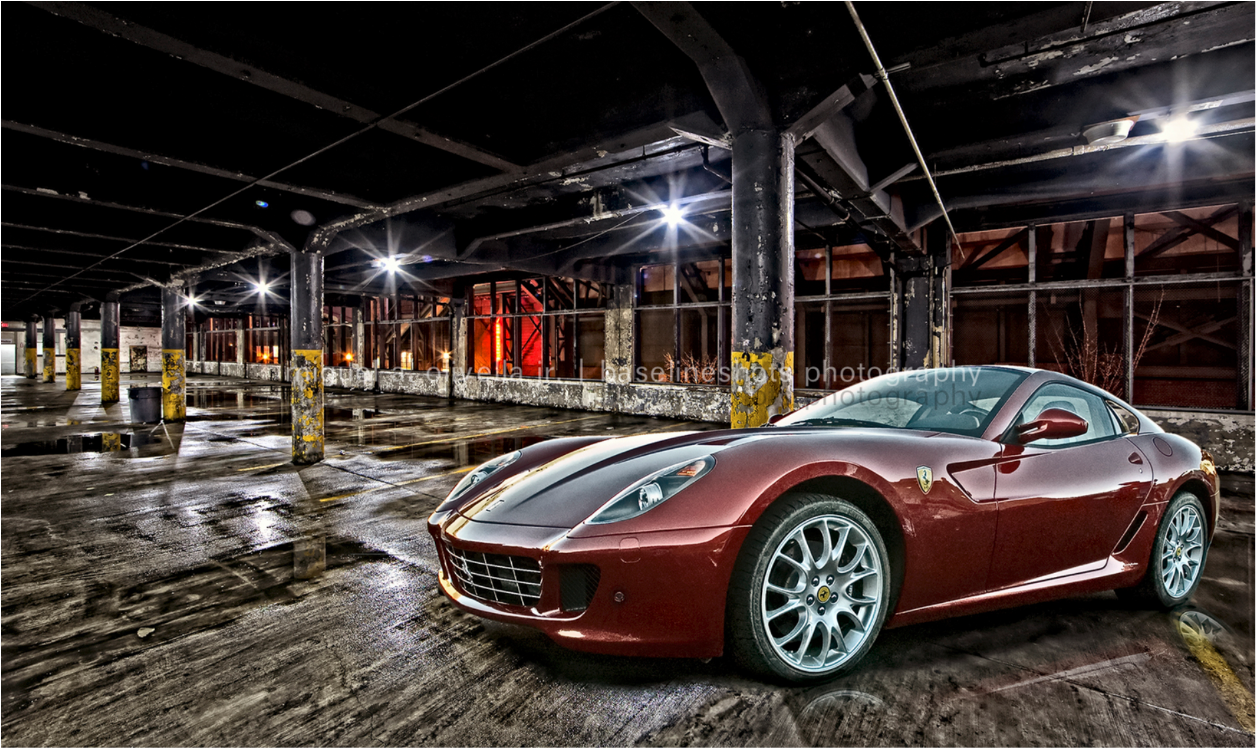 |
| Trying my hand at turning a mundane automobile image into something a little more eye catching |
Since then, I've had a chance to learn from Joel, Pete Collins (Kelby One's Photoshop Guy), Julieanne Kost (Adobe), and Glyn Dewis (UK photographer extraordinaire), picking up some of their tricks, techniques, and work flow as I continue to bumble my way through the world of compositing. I'm still a long way from approaching the work these folks create, but I get better every time I dive into Photoshop to create a composite.
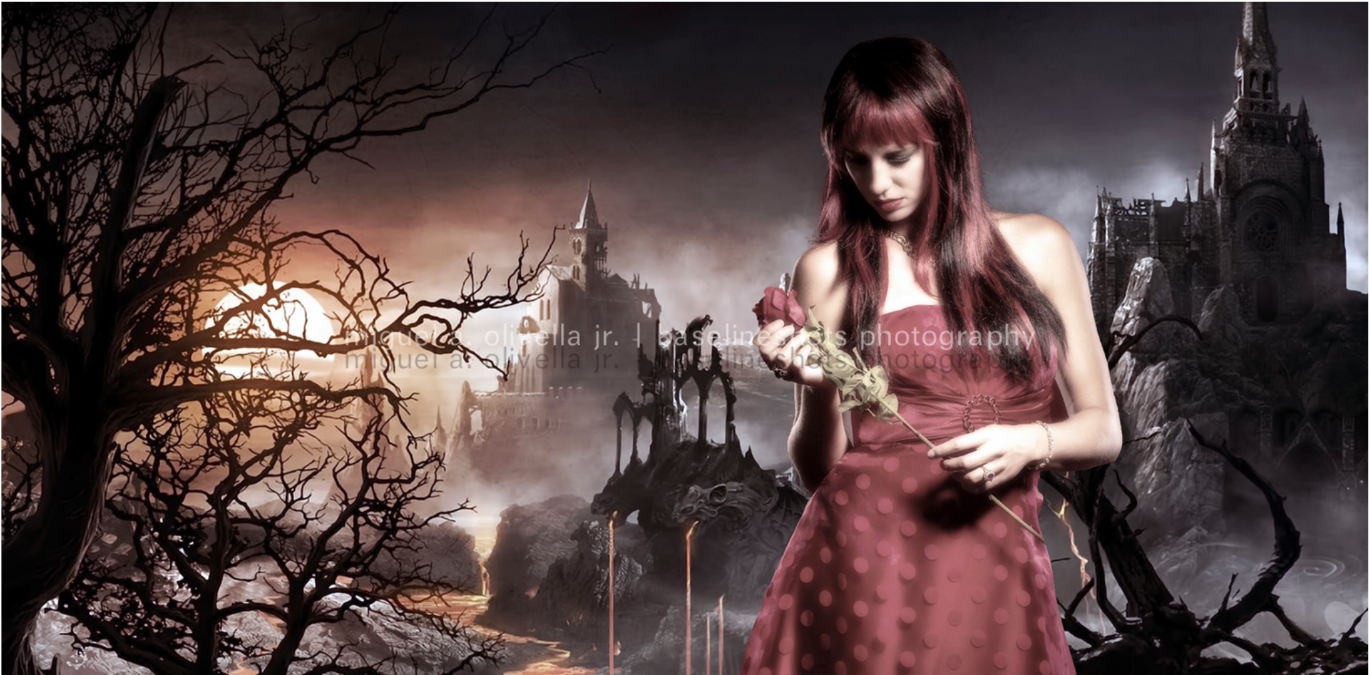 |
| Changing the mood of a studio model shot by layering her into a different background |
These are some of the composites I've created as part of my learning process. None of them are as good as they could be with more practice and experience. I still struggle getting shadows and highlights to be in the right places, edges of the image layered into the background being too harsh, yadda yadda yadda. That's OK. If I learn one new trick or one new step that generates a better image than my last effort, that's what it's all about.


Other composites I've created as I experiment with the technique
If you've never tried to create a composite, read on. I will do my best to give you a step by step process that you can hopefully follow from start to finish. It's hard to explain some of the steps with words rather than you actually being able to watch the process unfold but here goes. I will assume that you have a basic, working knowledge of Photoshop and that you are using one of the later versions (I will be using Photoshop CC). The earlier versions of Photoshop may not have all of the features that I will be using below (e.g., Camera Raw Filter in the Filter drop down menu) so you may have to improvise if you're running an older version.
OK, enough with the small print. Let's get started. I'll begin by showing you the final image that we will create - The Bodybuilder.
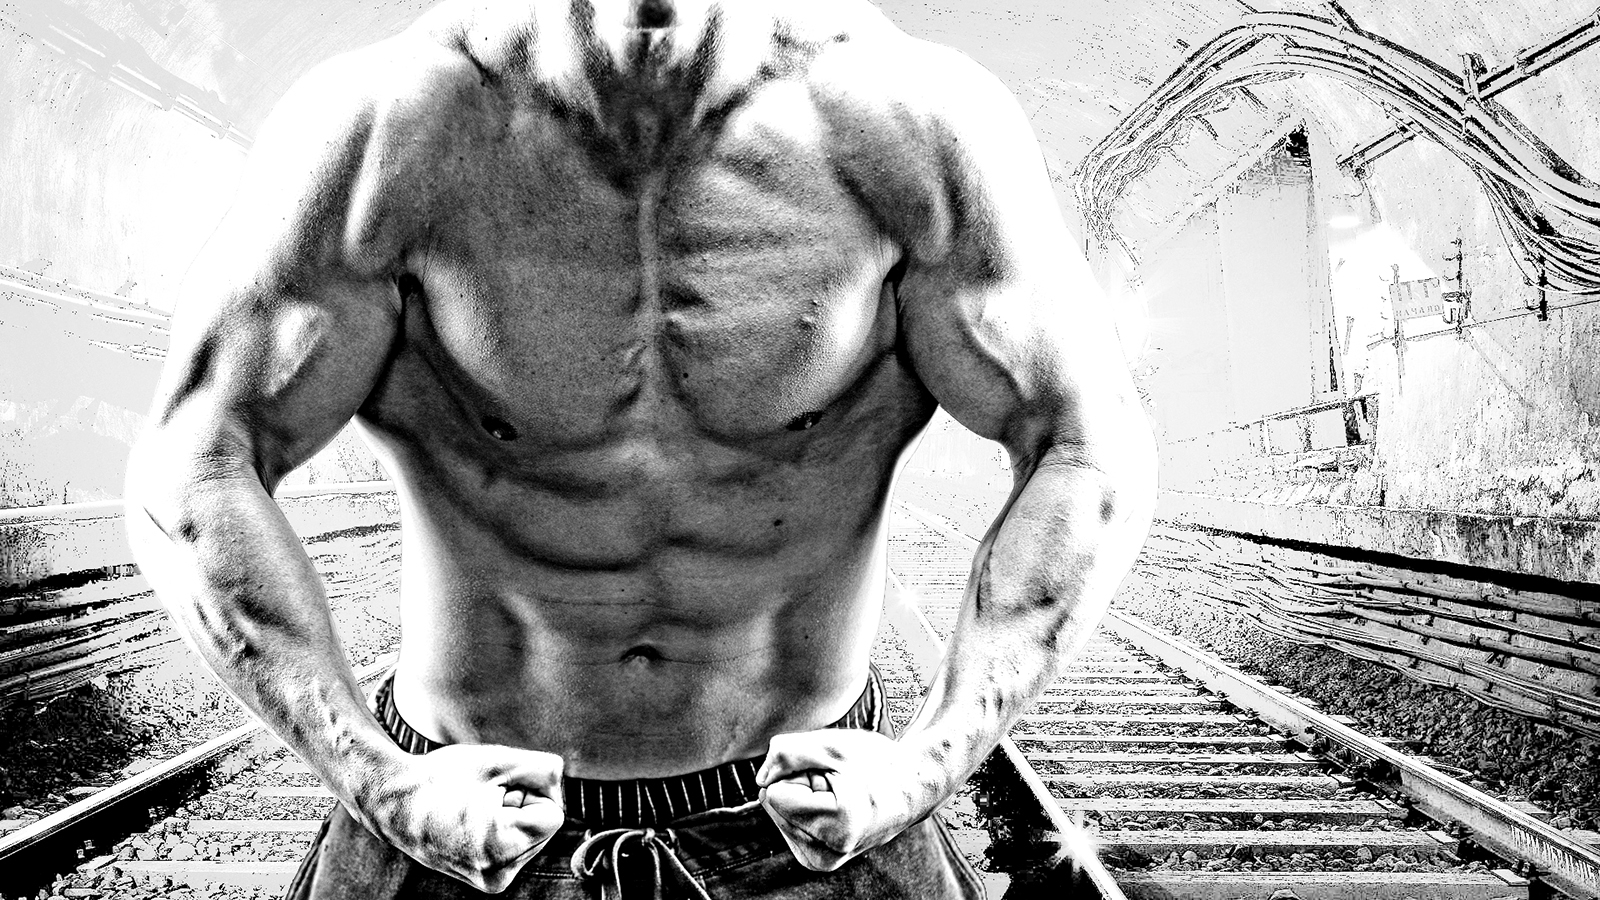 |
| The final image |
This composite used two images - a background image of a subway tunnel and a studio shot of a bodybuilder flexing his muscles. Step one is to open both images in Photoshop:
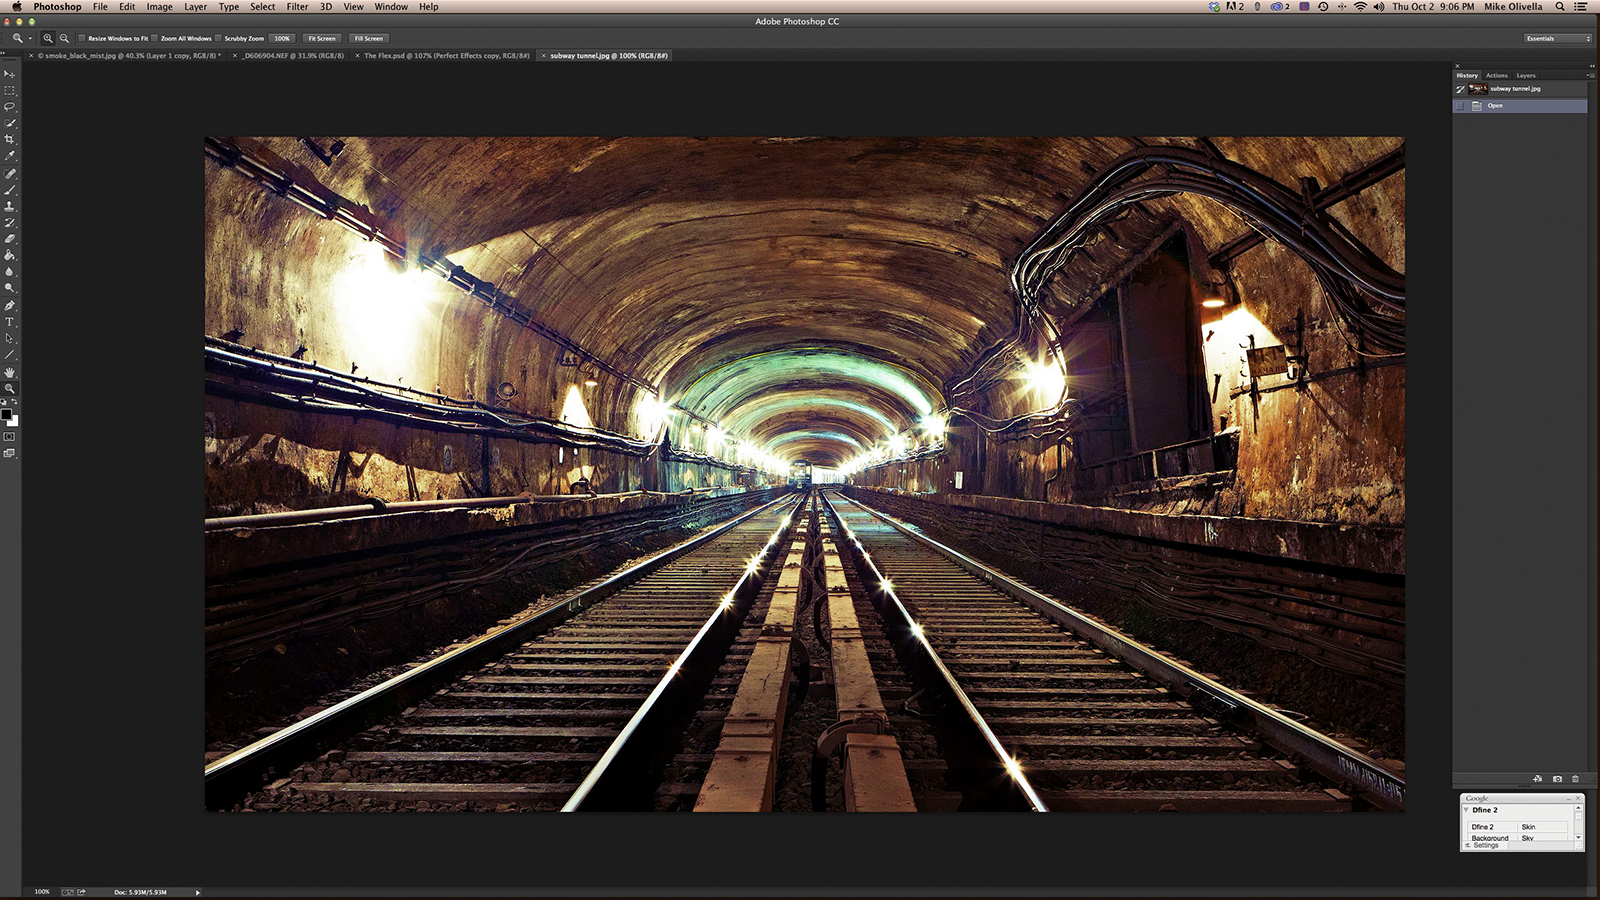 |
| Both images opened in Photoshop |
 |
| Dotted lines delineate the selected areas |
 |
| Choose the Quick Selection Tool |
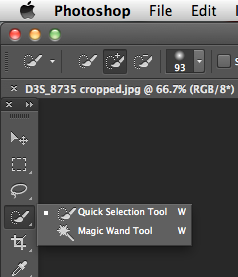
The next step is to work with the image that will be layered into the background which in this case is the bodybuilder image. Make this the active image in Photoshop and click on the Quick Selection Tool - it's the 4th tool down from the top if your tools palette is oriented vertically like mine (as shown on the left). Make sure that you have it selected as the active tool instead of the Magic Wand Tool by right clicking on the tool and selecting the Quick Selection Tool (a small white box lets you know which tool is active). Adjust the size of the tool so that it's relatively small and begin the selection of the image that will be "cut out" and layered into the background - as you left click inside the area you want to select, hold down the mouse button and move the cursor around. You will see dotted lines begin to take the shape of the cutout as you move the cursor around, delineating the selected portions. If the selected area extends beyond what you want, press down on the "Option" key (for Mac; for PC's, use the "Alt" key). As you move the cursor outside the area you want to select while holding the key down you remove the unwanted selections. With time and patience you will eventually have the area you want to select completely outlined within the dotted lines.
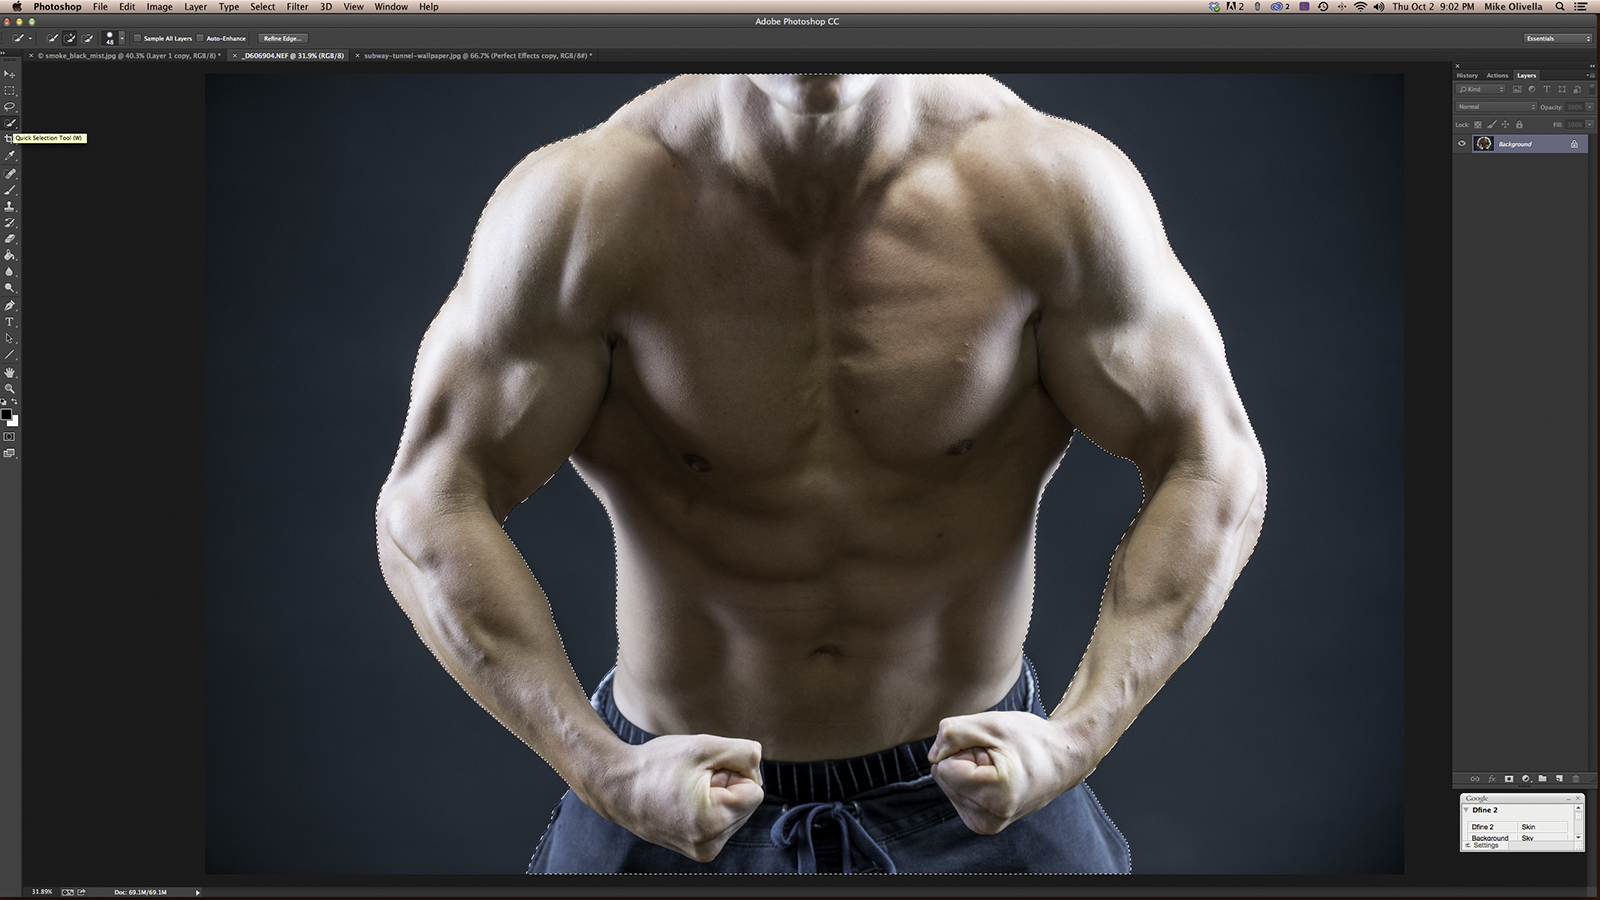 |
| Dotted lines delineate the selected area |
Next use the Refine Edge feature of the Quick Selection Tool. With the selected area still active, click on the "Refine Edge" button at the top of the Photoshop page (the last button that says "Refine Edge…" - see below):
 |
| The Refine Edge button at the top of the Photoshop page |
That will open up a box that gives you some options with the selection you've made.
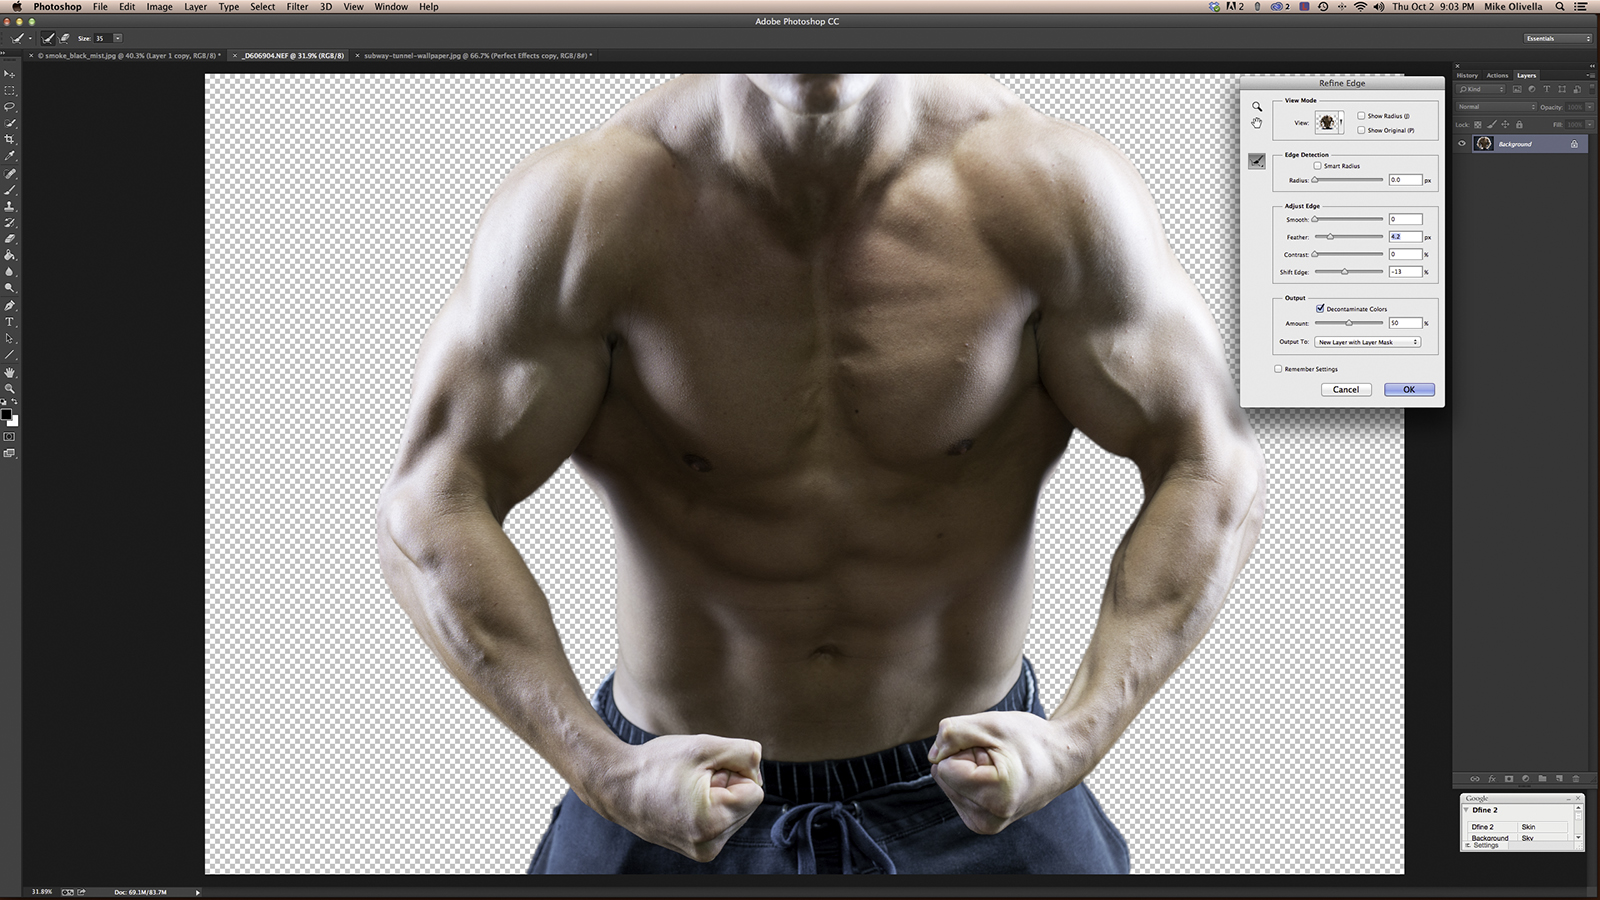 |
| The Refine Edge box will pop open after you click on the button |
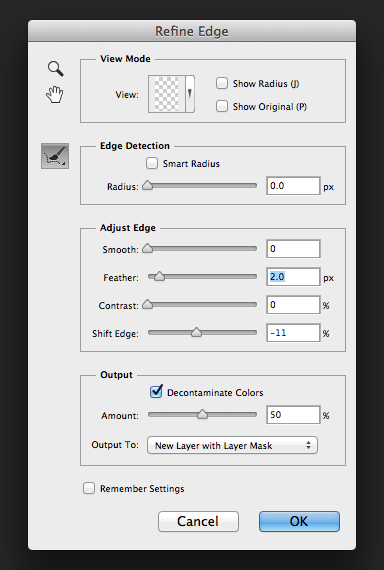 |
| The Refine Edge box with the various adjustment options |
Adjust the "Feather" and "Shift Edge" sliders as I've done above - add feather and shift the edge inward. You'll have to experiment with the settings because the amount of feather added and the reduction in the edges is dependent upon the file sizes you are using. The larger the file size, the more aggressive you need to be with the settings. Your goal is to shift the edge inward (a negative number) and add just enough feather so the image edges are ever so slightly blurred. This will make your selection look more realistic when you drop it into the background. As Pete Collins once reminded me, objects are three dimensional and the edges of the cutout image need to be blurred slightly in order for them to look right when pasted into the background image. Joel Grimes calls this "selling the fake". The more realistic you can make the "fake" (the composite), the better the overall image will appear.
Notice that I have clicked on the "Decontaminate Colors" box towards the bottom and that I have set the Output to "New Layer With Layer Mask". The Decontaminate feature removes any color cast from the edges of the image that may have digitally spilled over from outside the selection. As for the Output, you'll definitely want to have it as a new layer with mask. When you click on the "OK" button, your selected area will be on a transparent background and when you move it onto the background the mask will give you the flexibility of further refining the cutout if need be by using the Brush tool on the mask. You'll see in a minute why this is desirable.
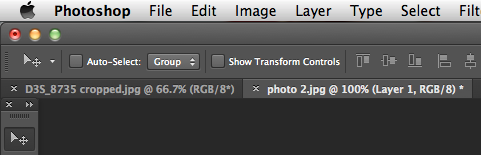 |
| The Move Tool - first tool from the top in the Tools box. It's the cross with the arrow on the left |
You're now ready to move the cutout into the background. Click on the "Move Tool" (see above) and move the cursor onto the selection. Hold the Left mouse button down as you begin to move the cursor up to the top of the Photoshop box where the two open images are listed.
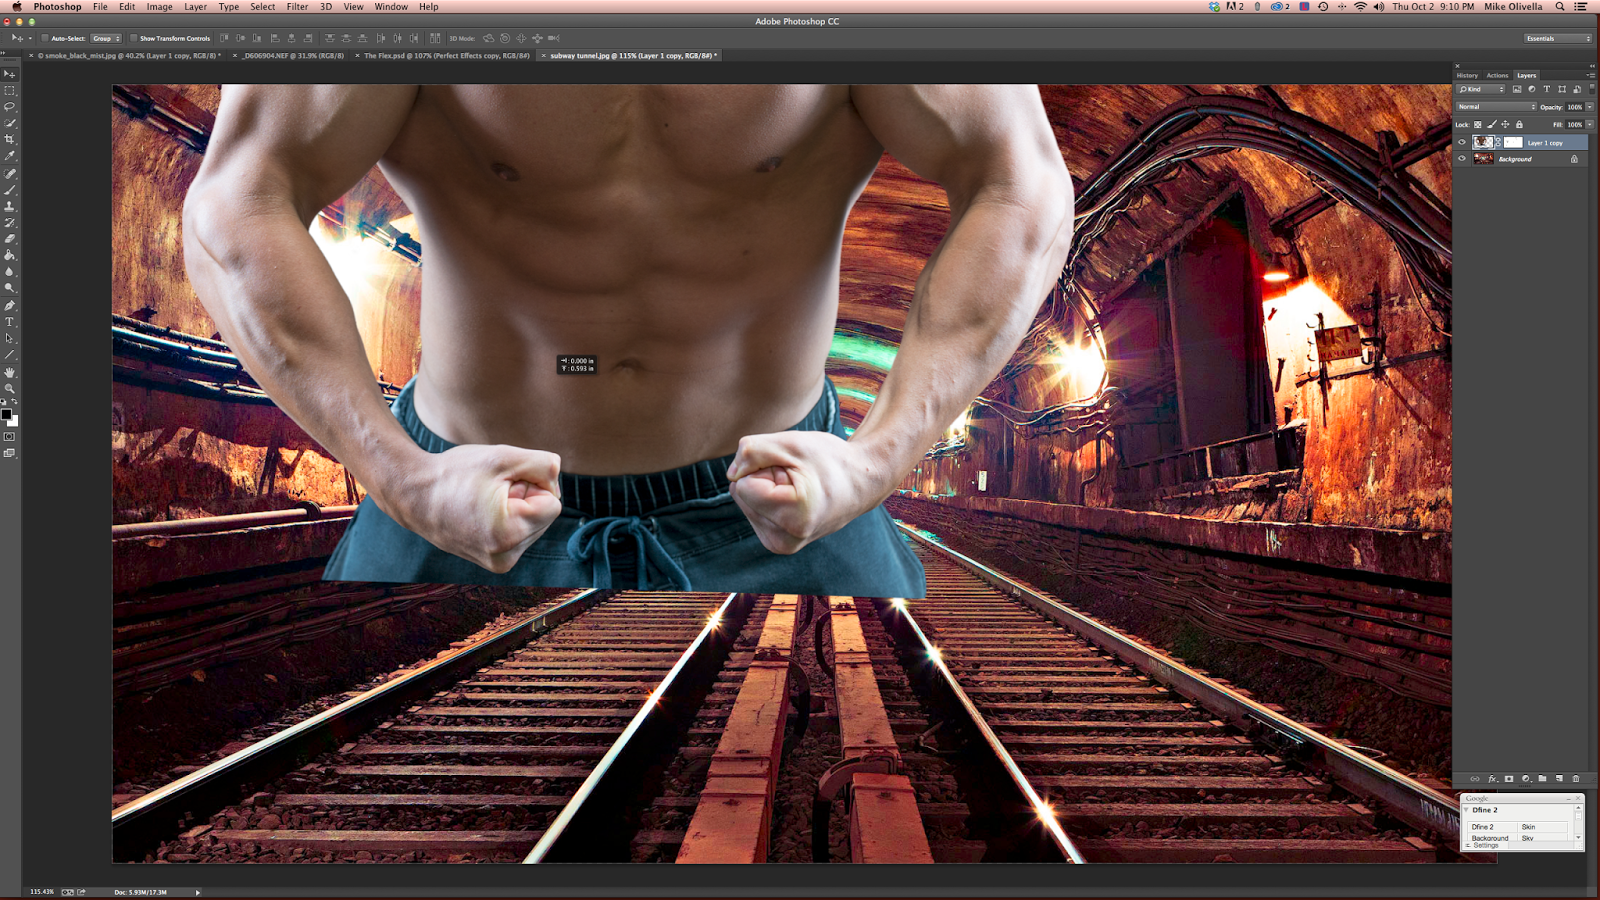 |
| Dropping the cutout into the new background |
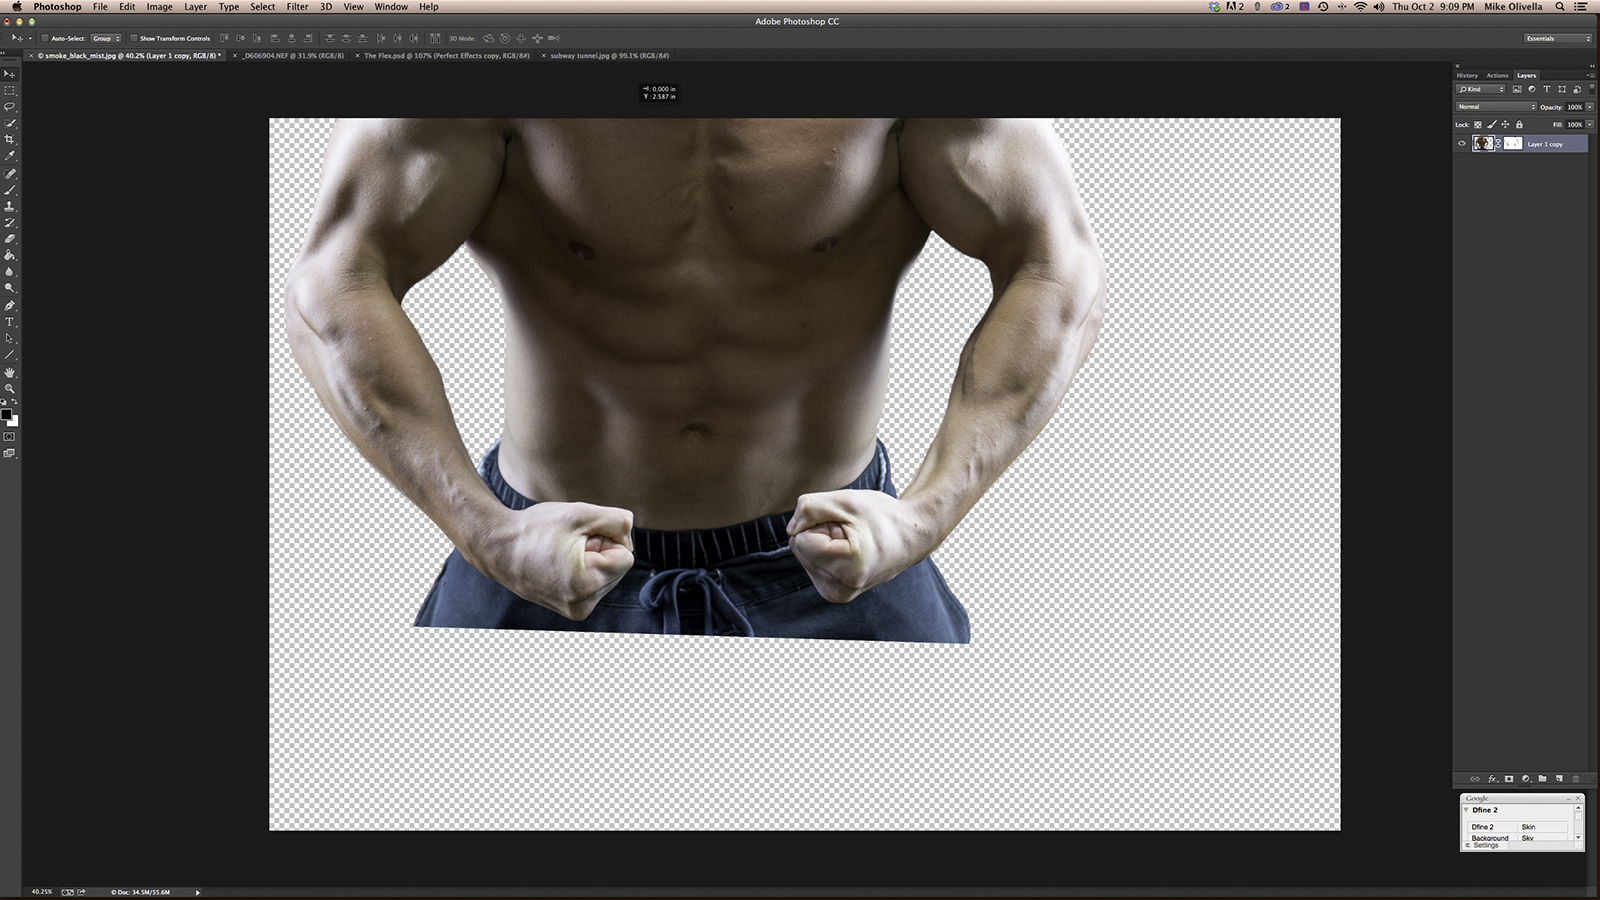 |
| Moving the cutout up |
The darker of the two image names at the top will be your background image. The lighter color image name identifies that active image - the cutout you are moving. As you drag the cutout up towards the top of the box, the cutout will move up with the cursor. Continue to move the cursor up so the arrow points at the background image name (the darker file name). Like magic, the background image will appear on your screen. Move the cursor/cutout down into the background and you will see your cutout appear. All that's left is for you to position the cutout where you want it as I've done below.
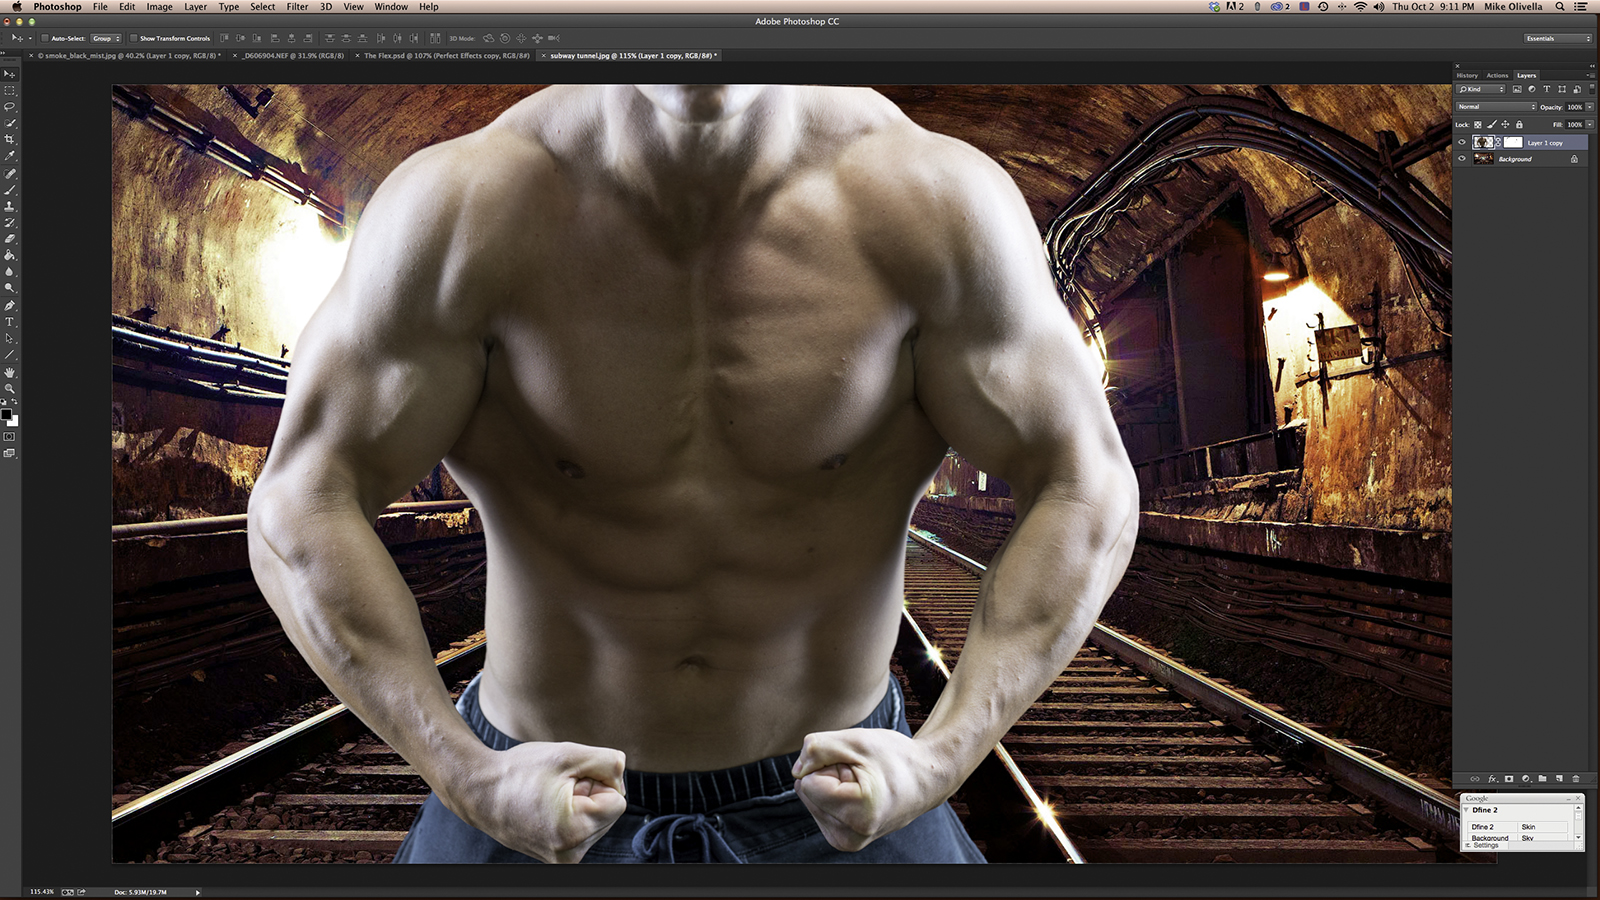 |
| Cutout has been dropped into the background layer and positioned where I want it |
By moving the cutout onto the background, what you've essentially done is create a layer on the
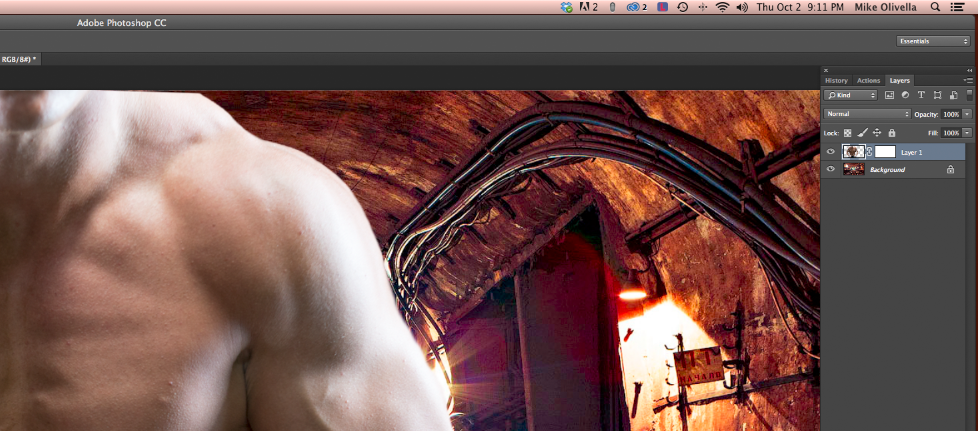 |
| The Layers palette (on the right) shows you the layers & any masks |
background. If you open your Layers palette there will be two small thumbnail images in the dialog box, one of the background image (identified as Background) and the other of the cutout (identified as Layer 1. At this point you are free to process each image as you see fit individually by activating whichever one you want to process.
To make processing easier of individual layers, disable the layer you're not working on by clicking on the "eye" to the left of the Layer description. Of course, you can choose to process both simultaneously by flattening the layers but that will limit your flexibility as you move forward. With the bodybuilder image we're using here, I chose to process each image separately.
Since each of us has different processing ideas, techniques, work flow, and software, this tutorial will now shift to how I processed the images to create the final composite image I posted at the beginning.
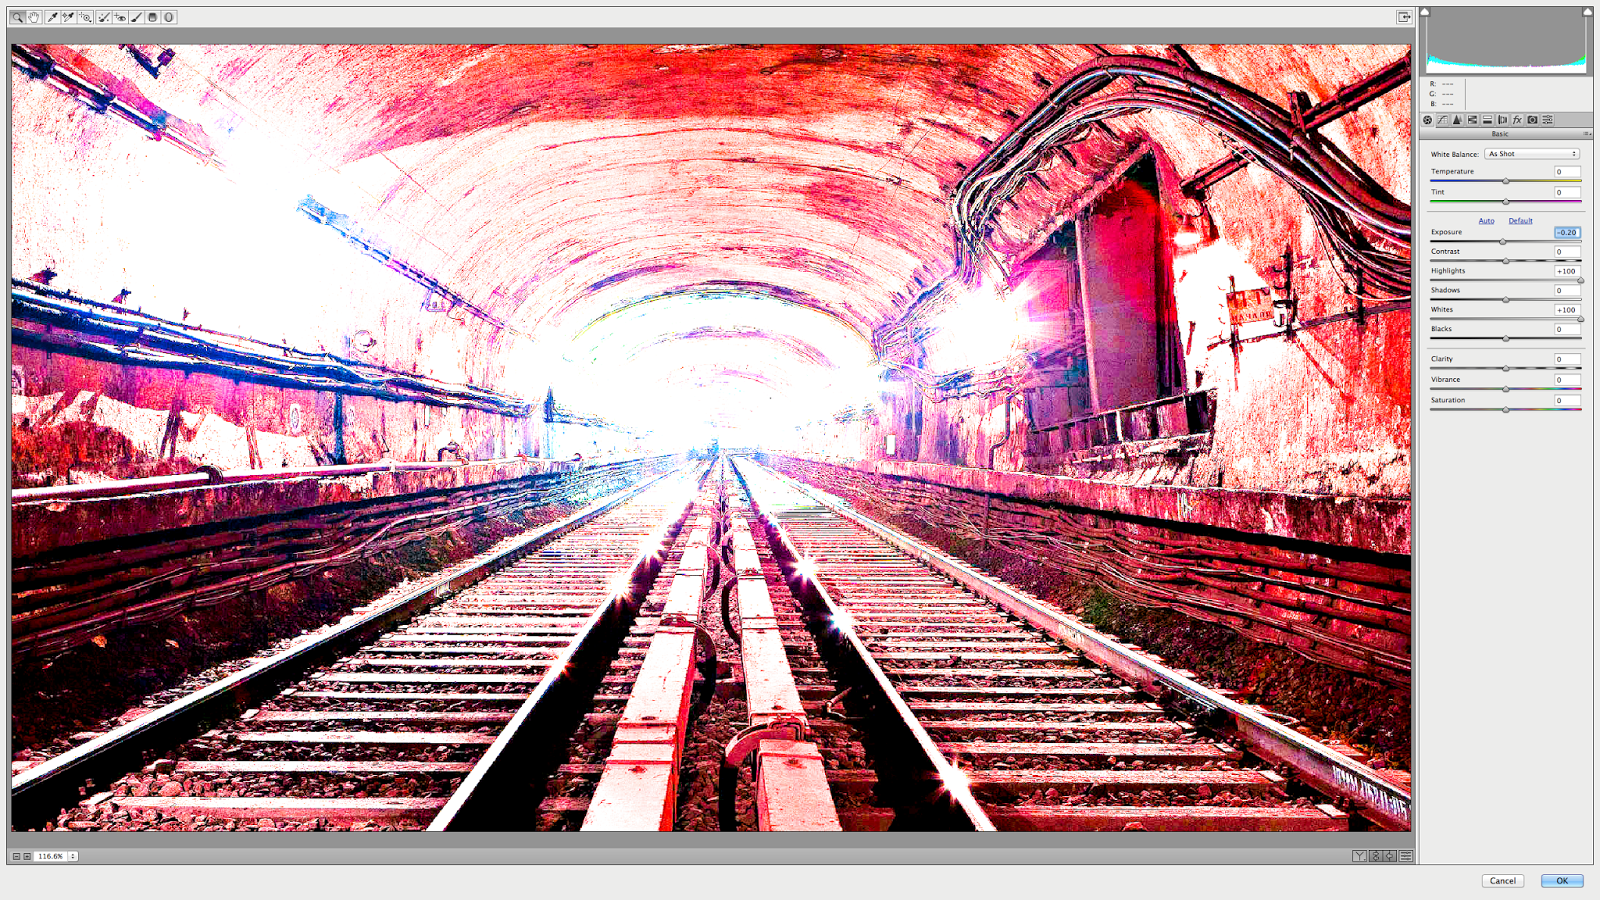 |
| Drastically increasing the highlights to create a backlighting effect |
I started by processing the background image. To create the effect I wanted (a surrealistic backlighting behind the bodybuilder), I first had to increase the exposure of the image and drastically increase the highlights and whites with the Camera Raw Filter. I also used the Brightness and Levels adjustments to increase the highlights even more. I then converted the image to Black & White using the Grayscale converter within Camera Raw (see below).
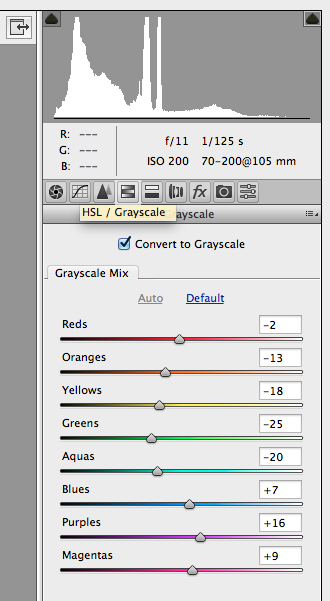 |
| The HSL/Grayscale tab in the Camera Raw Filter (fourth from Left) |
From the File menu, I then scrolled down to "Automate" and selected Perfect Effects 8 to further process the background.
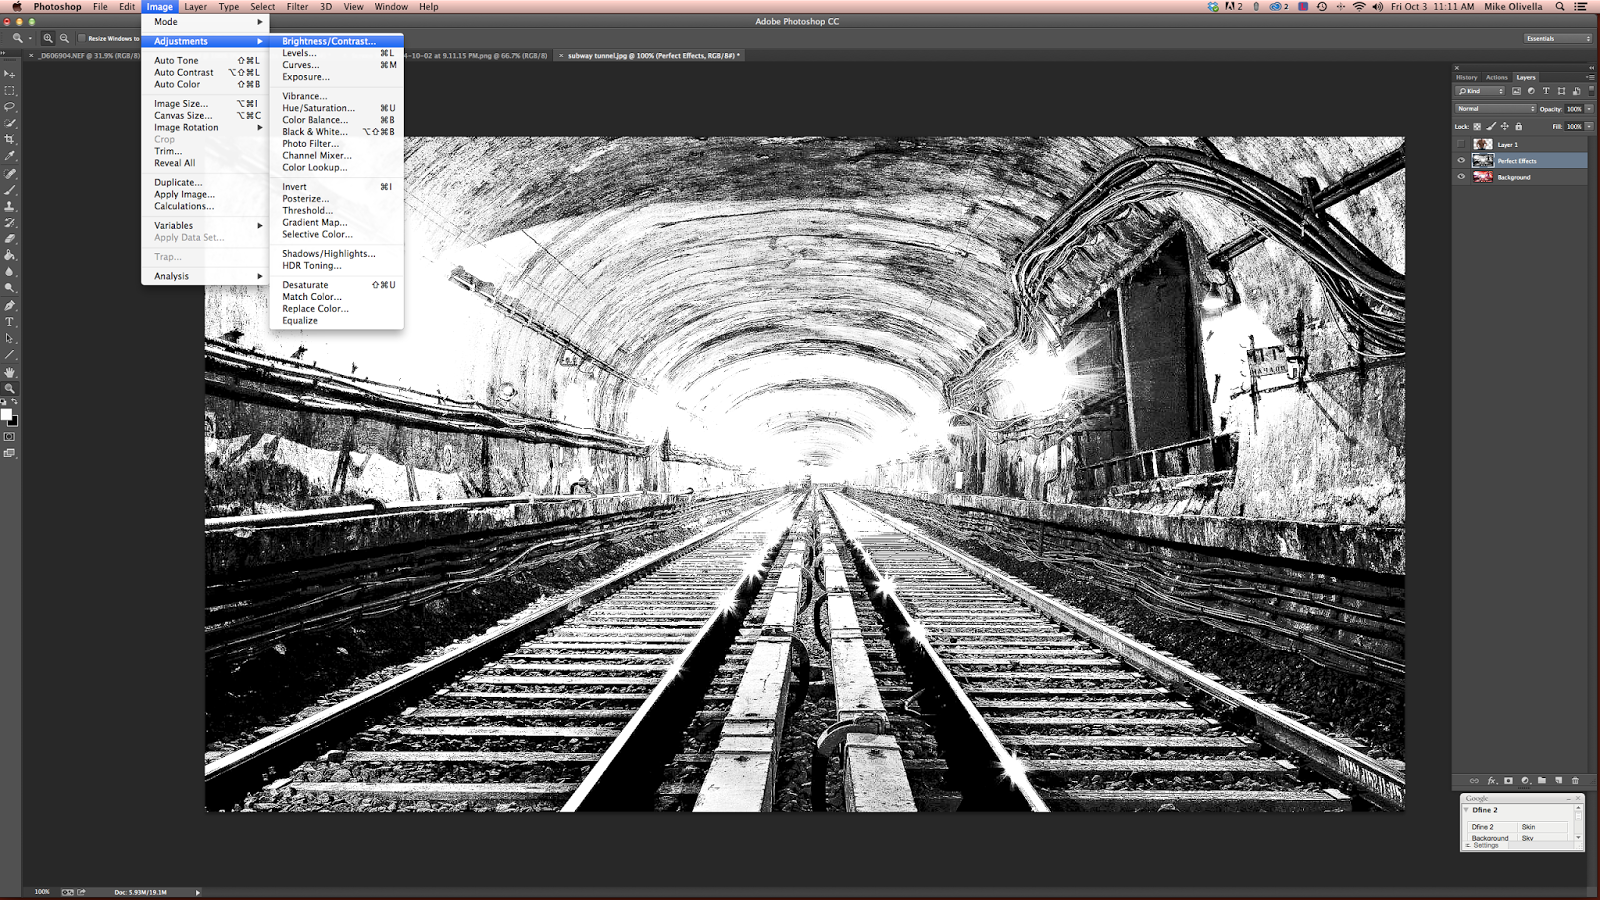 |
| Sending the image to Perfect Effects, a Photoshop Plugin I use regularly |
In Perfect Effects, I played with the tone enhancer presets, black & white presets, dynamic contrast presets, grunge presets, and HDR presets to get the right mix that yielded what I wanted.
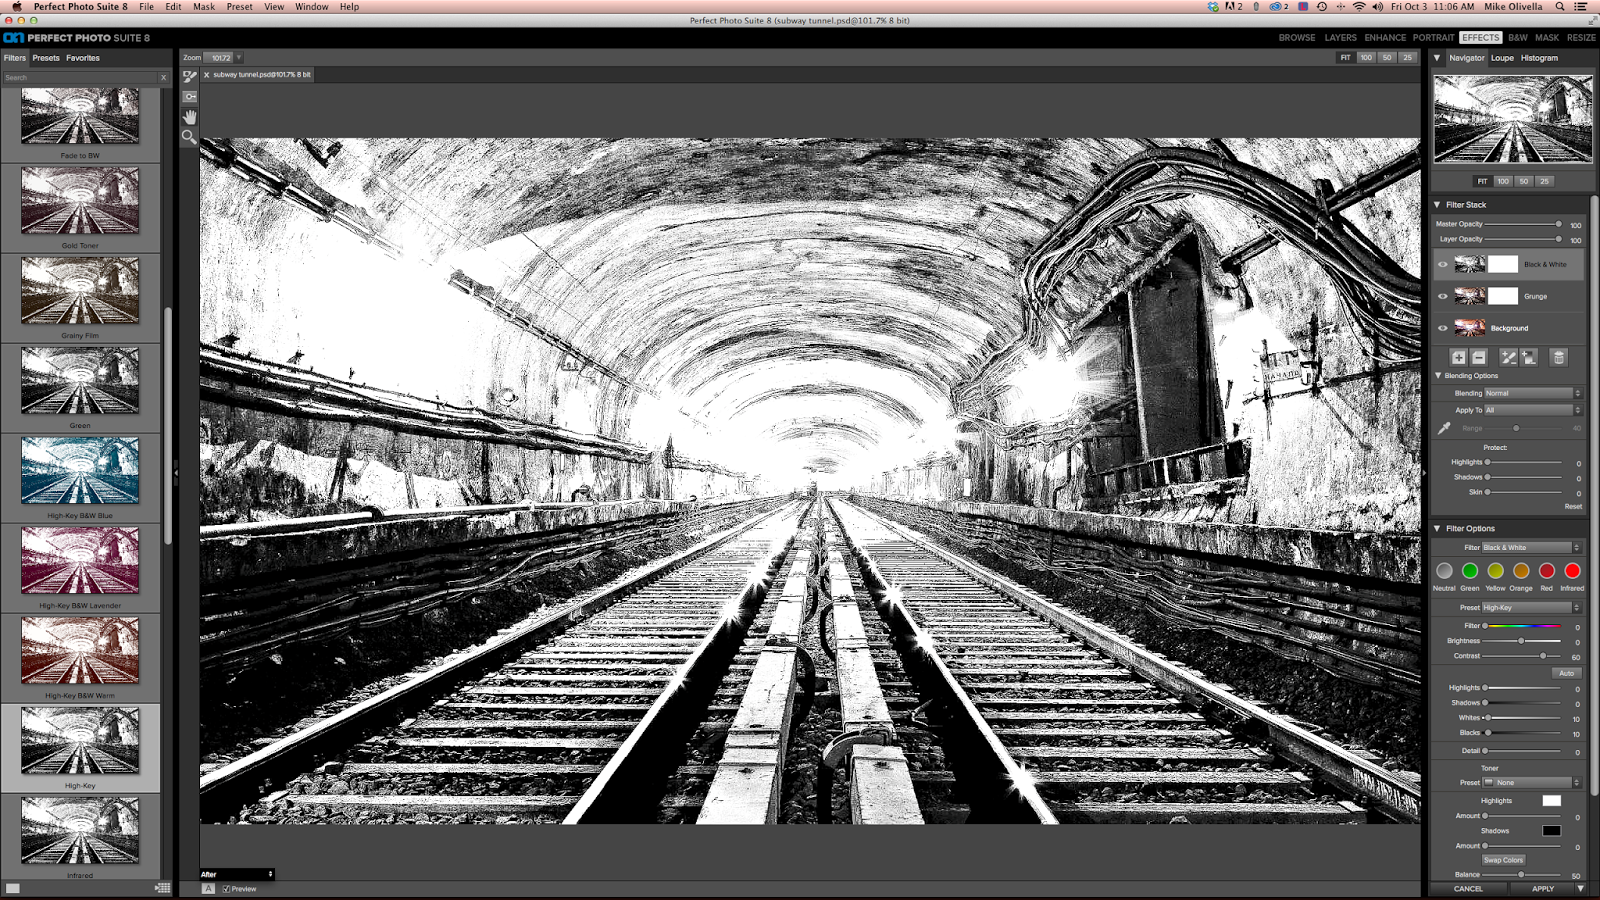 |
| Perfect Effects allows me to add/delete effects and see how they affect the image as I experiment with them |
After I got the background to look like I wanted, I applied the changes and moved on to the cutout. I activate it in the layers box and tweaked it with the Camera Raw Filter (adjusting the exposure, highlights, shadows, whites & blacks) then opened it with Perfect Effects 8. As with the background, I played with the presets and after the image looked the way I wanted, I applied the changes.
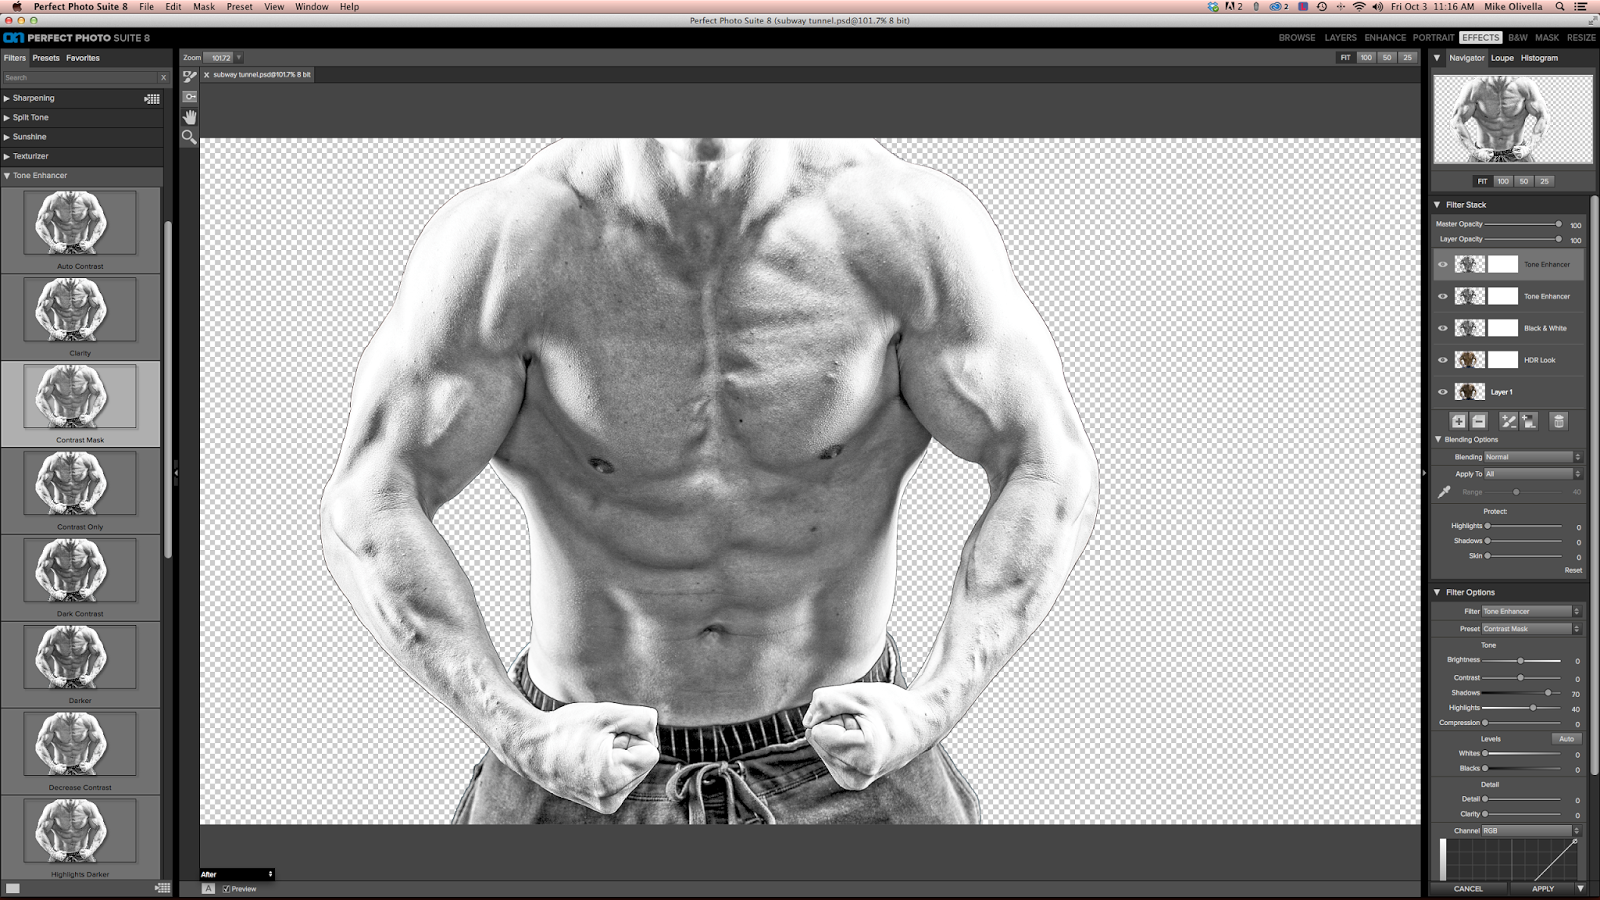 |
| The presets I used created a hard edge around the image which might be fine if I wasn't creating a composite |
After applying the Perfect Effects presets to the cutout, a problem cropped up - the presets created hard edges that looked like a black outline. This is where having dropped the cutout in as a layer with mask came in handy. I clicked on the mask and used a small brush with the hardness set at 0% and the opacity at 50%-75% to carefully run the brush over the black line edges. This removed them in short order and it made the cutout blend into the background much better than if I had left the black edges intact.
To finish up, I flattened the layers and saved the final image. Again, here's the final image after the steps above, "The Bodybuilder".
Now that you know how to create a composite, let your imagination run wild and start cutting and pasting images. You are no longer forced to live with what could be a great image but for the crappy background. The best part is, if you don't like what you end up with, you can always start over. All you've lost is time and you probably learned something along the way. Mahalo, ya'll.


