Showing posts with label studio photography. Show all posts

Tuesday, July 26, 2016

Speed Light Soft Box Diffusers - Portrait Lighting And More


Last week, I had to do a head shot photo shoot of all the personal trainers for a Gold's Gym location and it took place inside the facility as the trainers took their breaks in between sessions with clients. In finalizing the details for the shoot, I was told that I had to set up and tear down quickly using a minimal amount of gear in order to avoid being in the way of customers using the equipment to work out.

For a shoot involving portrait head shots I would normally grab a couple of cases containing monolights, some light stands, a couple of soft boxes, a beauty dish, and a background stand with a roll of seamless white or gray paper.  I was told not to bring that. "Just bring a flash", they said.

That was not an option for me. I know what portrait/head shot images look like when taken with "just a flash". The images look like crap because the lighting is not flattering to the subjects and no one is happy with the results. But clients don't know that. To them, as long as there's enough light to take a photo, that should be fine. As a a professional, I know better. Plus, my reputation is on the line and the last thing I want is for people to judge me by inferior images I created, even if the client unintentionally handicapped my efforts.

Forced to compromise, I resorted to a quick, easy (and cheap) alternative to my usual studio lights - speed lights with small soft box diffusers.


A couple of years ago, I was strolling through Best Buy and stumbled across these small speed light soft boxes that fold flat for storage and attach securely to any brand of speed light with an elastic velcro strap. I found two in open boxes and couldn't pass them up for $15 apiece. I didn't know if I would ever use them but for $30 for the pair I thought they might come in handy someday.

Since then, I've used them a lot. When shooting grip and grin events, these are my go-to speed light  attachments. I can angle the flash 45 degrees up and bounce the light off a ceiling or shoot straight at the subjects. Either way, the light that reaches them is soft and shadows behind subjects are virtually eliminated.


During a recent event, I used the soft box on a speed light, mounted the speed light on the hot shoe of my camera body, and pointed the soft box directly at my subjects. I was afraid that the speed light wouldn't be able to diffuse the light sufficiently to light up all the subjects in this image but it was absolutely no problem for this little soft box. There are no shadows behind the subjects, little if any light fall off, and the light is flattering, all things considered.

But a head shot photo shoot was an altogether different challenge. Would these little soft boxes do the job,  give me the image quality I strive for, while at the same time allowing me to use a minimal amount of gear?


These are examples of the end result from the photo shoot at Gold's Gym. Head shot portraits of some of the staff taken with two speed lights and two of the Best Buy speed light soft boxes.


Because space was at a premium, I did not use a background stand or seamless paper for the shoot. However, I did use a couple of light stands to set up the speed lights. Although I packed a stand and paper roll (just in case there was no suitable background), after arriving on location I found a gray wall that was out of the way and which served as a perfect background.

Positioning the subjects 5 feet away from the wall, I set up the lights at 45 degree angles on either side of the subjects. I set the speed lights to Manual mode, used a flash meter to test the exposure, and first metered the speed light on the left (my key light). I adjusted its power and distance from the subject until the meter read f8.0. I then did the same with the speed light on the right (my fill light) until the meter read f5.6. If I had wanted to really simplify things I might have been able to use a reflector for the fill instead of the second speed light but a reflector would have taken more room so I went with two lights.

So, if you're ever confronted with a portrait shoot where space is a premium, if you choose to do a shoot with a minimal amount of gear, or if you simply want to dabble in studio portrait photography and don't want to spend a lot of money, give these small soft boxes a shot. Even with the speed light strobist craze that has jacked up the price of used speed lights, brand name speed lights are still available on the used market. Since I prefer to use the lights in Manual mode, there are plenty of used Nikon SB24's, SB25's, SB26's, etc. available for $30-$50 apiece. Depending on the model, infrared triggers will remotely trigger them. If not, there are many inexpensive (but dependable) wireless triggers that work perfectly well.

Saturday, January 9, 2016

Beauty Without The Beast


When I shoot a model portfolio, if the client does not have a beauty shot, that's where I start the session. Because there's no wardrobe involved and hair is pulled back tight in a pony tail, it takes very little pre-shoot time to get this shot in the can. Makeup is typically benign, mostly eye makeup and some lipstick so again you're shooting within a relatively short period of time after the session begins. The idea for the shot is to emphasize the model's natural beauty without a lot of makeup, accessories, or clothing to compete with the face.


Some photographers set up this shot with only one light, a beauty dish centered, above, and pointed down at the model's face at a 45 degree angle. I use this set up as well but I find that using just this one light creates a noticeable shadow under the model's chin. I have experimented with reflectors, foam core sheets, etc. under the chin but the amount of bounced fill light is just not enough for my taste.  My solution is to add a second light with a small soft box in front of and below the model, angled up at her chin at a 45 degree angle. If the beauty dish is metered at f11, I'll experiment by metering the second light at f5.6, sometimes pushing it up to f8 and even f11, depending on the look I'm after.


Here's the final image with the setup depicted in the previous image. I was going for a very high key kind of look which is easy to accomplish with the lighting setup used. Here are a few more shots from the same session.


For a brighter, super high key effect, try a large soft box instead of a white seamless backdrop and meter it at f11. My 4'x8' soft box is perfect for this and when used it adds a soft envelope of light that wraps around the model's face. Here's an example.


So, whether you go with the super high key look or something a little softer, try using that second light under the chin to eliminate the shadow created by the key light above the model's head.


Wednesday, September 24, 2014

Quick & Easy Head Shots

Many businesses that have web sites include a page or pages featuring head shots of its employees. One type of business that almost always uses head shots of its employees on its web site is a law firm. Google any law firm that is of any size and you will find a link for a comprehensive list of its attorneys. Each attorney will have a link for his or her own page that includes their educational and professional experience along with ... a head shot.

Since law firms want to present their attorneys in the most flattering manner possible, they usually have the head shots done professionally. That's where you, the wily professional photographer, comes in. You can do a quick and easy head shot session on site if you set yourself up with a minimum of gear and use some basic lighting techniques. From there, very profitable photography gigs can follow as you develop a reputation for being a capable web site head shot photographer.

I just finished doing one of these head shot gigs last week for a law firm that is revamping its web site. It's a small firm so the shoot involved seven attorneys and the firm's office manager (one of the attorneys was out of town and will come into the studio for her head shot in the near future to finish up the job). From the time I left my studio until I returned, which included an hour driving to and from the firm's offices, less than three hours elapsed. Afterwards, I spent approximately an hour downloading the images, selecting the best one of each person, and running them through Photoshop. Including the time it will take to shoot the last attorney, I will have devoted a little over four hours for the entire job. Oh, and I received a nice check for my effort before I left the firm's offices the day of the shoot, paid in full for the job.


The image above depicts the gear I took with me. The two aluminum cases on the left contained three Photogenic 600W/second monolights that I picked up on eBay a while back for a total of less than $200 (with cases). I could have opted to go with speedlights but since I have the monolights packed up for things just like this I went with the monolights. I only used two on this job but took a third as a spare. The smaller aluminum case also contained power cords, extension cords, a spare bulb for the moonlights, a flash meter, and three pocket wizards to trigger the lights. With a two light setup, two pocket wizards suffice (one on the camera and one on the key light - the other monolight will fire via its slave sensor), but I always assume something might not work right so I packed an extra pocket wizard, monolight and an extra bulb.

The camera bag on top of the small aluminum case contained two camera bodies (again, redundancy in case of a failure), a 70-200mm f2.8 lens (my go-to portrait lens), an 18-200mm f3.5-5.6 lens (another great portrait lens, a spare just in case), and an 85mm f1.8 lens (another sharp portrait lens, just in case). I took a stool on which the subjects could sit since I was fairly confident the law office would not have one for me to use. The black bag on the left contained a portable backdrop stand and a roll of 53" wide grey seamless paper. The black bag on the right contained three light stands, two to use and the third as a backup. Last but not least, I packed two softboxes, a 9"X36" gridded strip box to use as my fill light and a 2'X3' box to use as my key light. For head shots, you don't need anything bigger as these boxes are more than enough to light head shots. 


I'll digress for a moment to elaborate on the speed light option. Several companies make brackets designed to attach a typical strobe to a soft box (as shown above). These lights can be triggered with pocket wizards or infrared triggers. Using speedlights is certainly a less expensive way to adequately light head shots and if you don't have access to monolights and have speedlights, by all means use them. Another option is to simply use one light (monolight or speedlight) for the key light and a reflector for fill. It's simpler and less equipment intensive but I prefer to use a two light setup when possible with monolights. If electrical power is not available (as in shooting in a remote location), Plan B is my speedlights.

Once I arrived at the law firm, it took less than a half hour to set up in the lobby. This was the location that provided plenty of room for not only the lighting setup but for me to use my 70-200mm lens at a 135mm to 150mm focal length which I find to be a good portrait focal length. I could have set up in the firm's large conference room (behind the backdrop) but it would have required moving the large conference room table to one side. Since the lobby was available that's where I set up.

The large softbox (left) was my key light and the strip box was the fill. Using a pocket wizard, my flash meter, and myself as a guinea pig sitting on the stool, I adjusted the power of the key light to f11 at 1/125th second, ISO 200. The power of the strip light (right) was adjusted to f8 so as to give me a slight shadow on the fill side but nothing dramatic. The lights were positioned approximately three feet from the subjects to create a soft, flattering light (Lighting 101 - the further lights are positioned from a subject, the harsher the light becomes).

I've posted some examples of the images from the shoot. For each person, I took several shots like those on the left side, i.e. from the head to just below the hands. I asked each person to sit up straight at a 45 degree angle to me and then turn their head to face me. Some of the shots were with full smiles, some with no smile, and some with something in between. After I downloaded the card, I chose the image I thought was most flattering for each individual and ran them through Photoshop and OnOne Software's Perfect Portrait and Perfect Effects. After opening the RAW files in Photoshop CC, I used the Camera Raw filter in to adjust exposure, highlights, whites, shadows, and blacks, adding a bit of contrast, clarity and vibrance. The Spot Healing tool, Patch tool, and clone tool were used to eliminate blemishes and shine. I only used Perfect Portrait to brighten the men's eyes and judiciously whiten the teeth. With the females, I used some of the skin smoothing/wrinkle softening features but very modestly. Finally, I used the Portrait Sharpen feature in Perfect Effects as the final step and then cropped the images into the final head and shoulders head shots (images on the right).

There you have it - quick, easy, simple head shots on site. This kind of photography is not going to tap into your creativity or generate "wow" images that will dazzle your friends but it can be a steady source of income that pays the bills. That's always a good thing.

Monday, May 13, 2013

A Day With Joe McNally

Joe McNally provides tips on lighting
Even though a few weeks have passed, I'm still marveling at what a great experience I had spending a day with the one, the only, +Joe McNally during Tuesday's pre-conference Workshop at the recent Photoshop World. Joe's pre-con workshop was  "Characters on Location! Telling Stories With Light", a 7-hour McNally-fest into his world of lighting.

I began following Joe's work a few years ago after hearing +Scott Kelby rave about Joe. I knew that Joe wasn't just another pretty face in the world of photography, he was the real deal. Joe's accomplishments include numerous cover assignments for TIME, Newsweek, and Fortune, to name a few. He has shot for Sports Illustrated, LIFE magazine, and has been an ongoing contributor to National Geographic for over 20 years. That's a pretty sporty resume, my friends. But over the past few years, I wasn't fully aware of just how much Joe pioneered the use of hot shoe flashes in outdoor settings like no one else.

So, when I was trying to pick one of the pre-con workshops to attend, I had to flip a coin between Joe's workshop and +Moose Peterson's workshop. Moose was leading a group at a local airport to shoot vintage airplanes and models dressed in period outfits, something I dearly wanted to do. But, I couldn't do both so I had to choose, and the only way to do it was to flip a coin - heads was Joe, tails was Moose. It was a win-win for me any way the coin flip turned out. Joe won, so next PSW, I'll be going with Moose.

The studio. Joe (L, with Nadia) explains his image possibilities to the group
Joe's workshop began at noon at the convention center and included a one-hour, give and take discussion on lighting while we ate a yummy boxed lunch. Within a matter of seconds, it became readily apparent that not only was Joe much more than I thought as a photographer, he was the most down to earth, nicest guy you'd ever want to meet. We were treated to a sampling of Joe's work, the stories behind some of the images, and how he approached the lighting setups as the appetizer to what would be an incredible main course.

While Joe took us into his lighting world, a downtown Orlando photo studio was being prepared with sets, makeup artists, hair dressers and assistants getting ready for us to come over by bus for a photo shoot. Five different sets were being created, each with different lighting set ups and backdrops for us to use. Five different models were booked, dressed, coiffed and made up as befitting their "character": a firefighter with full gear; a shirtless, skater-looking guy;  a "country" girl; a vampy looking fitness girl; and Nadia, a rhythm gymnast. Nadia had three hula hoop-type silver rings and, holy moly, the things she could do with those rings.

Three of the five sets with their respective models
Four sets were inside the photo studio with the fifth one located just outside the back door of the studio along its orange wall. Each set's lights were set up and metered before we arrived and the suggested exposures were prominently displayed on a sheet of paper taped to a light stand. This information gave us an exposure starting point for each set which was very helpful, avoiding each person having to guess at what settings with which to start. This greatly sped up the shooting process so all the workshop participants could have enough time to get their shots in and move on to the next set. Even with some 10-20 people waiting their turn at every set, things flowed smoothly.  Everyone had plenty of time to compose, direct the models, have the lights adjusted or moved, and shoot.

The outdoor set
When we first arrived at the studio, Joe took us through each of the sets and gave us a brief run through on what he might do on each. He then turned us loose to shoot. As we did, Joe walked from set to set making suggestions, offering insight, and challenging us to create different atmosphere with the lighting at our disposal.

The vamp
No question went unanswered. If I wanted to know how Joe might create a certain mood, shadow, or look with any of the models or on any of the sets, I simply had to ask and Joe would walk me through how he would do it . Many times, he suggested something that he thought might be better or more interesting. He encouraged us to direct the models to ensure individuality in our images, a great way to gain experience in posing models under the tutelage of a master.

Nadia, with one of her hoops
After everyone had their turn with the models/setups, Joe stepped up and did his own photo shoot, indoors and outdoors. He gave us a one-hour demonstration on how he works with both studio lights and hot shoe strobes, and after that, the models changed sets and we were back to shooting. The workshop wrapped up at 6:00 pm when we boarded the bus and headed back to the conference center while Joe answered questions in his affable, humble manner.

My attempt to go artsy fartsy with firefighter guy 
Firefighter guy
Country girl

It would be impossible for me to go through all the things I learned during the workshop so I won't even try. If you have any interest at all in lighting and you have a chance to attend one of Joe's workshops, don't give it a second thought. I enjoyed Joe so much that I followed the workshop up by attending his conference session on Wednesday, "Hot Shoe Flash - The Next Step". This session took what I learned during the workshop to the next level. After I walked out of Joe's hot shoe class, combined with the things Joe showed us at the pre-con workshop, I realized just how much I had been missing in terms of image creation by being so ignorant as to the oh-so-many potential uses for hot shoe strobes, indoors and outdoors. Until PSW, I used a hot shoe flash only to light up shots I knew I couldn't get without natural light. Duh.

Skater guy
As soon as I returned from Orlando, I have engaged in a mission to beef up my hot shoe strobe gear.  I jumped on two used Nikon SB-800's and a used SB-600 to go with the SB-900, SB-800 and SB-28 I already owned. Nikon's SB900, SB-800 and SB-600 (and the newer SB-910) are part of Nikon's Continuous Lighting System (CLS) and all can be triggered wirelessly in a variety of ways (like by my SU-800 Commander transmitter) without need for pocket wizards or other such triggers. I also found a used Nikon SU-4 wireless remote that will allow me to use the SB-28 in TTL (and manual) mode and fire it in conjunction with the other Nikon CLS strobes. I'm still on the lookout for two more used SB-600's so I can use three of them on a new 3-strobe bracket and my new 7' parabolic shoot-through umbrella (Joe turned us on to this bad boy during the workshop).

Nadia, part deux
With the insights provided by Joe, I'm excited about the prospect of a whole new world of image creation possibilities outdoors. I know I will never have access to the countless hot shoe strobes Joe uses, but with three SB-800's, three SB-600's, an SB-900 and an SB-28, I'll be equipped for a lot of different types of lighting that I can't wait to use. I will no longer be chained to the studio for studio quality lighting and other images will be so much cooler as I supplement natural light with strobes or shoot on location indoors without having to lug a bunch of studio lights with me.

Thanks for bringing me out of the dark ages, Joe. I owe you big time.


Wednesday, May 1, 2013

My Photo Studio Re-Configuration


My photography studio is like my second home. I moved into the new space (shown above) almost two years ago after tiring of having to drive all the way across town any time I wanted to use it. The new location is a mile from home so it's way more convenient but convenience came with a trade off - giving up warehouse-type  space with high ceilings and a lot more room.

Getting the space ready to move in
The building is approximately 1100 sq ft with a 10' long half wall that divides the front half of the space in two. The front half of the space is divvied up between my law office and my music studio. The entire back half is the photo studio. Since my law clients are all out of state national companies, I don't need conventional law office space for my law practice, just a place where I can make/take calls and prepare for my out of town cases. Having all three things under one roof is a dream come true - I can work, write/record music and shoot photos all in one place. Can you say Man Cave? 


When I first moved in, it was a challenge as to how to set up the lighting equipment to make the space work because of the limited floor space. The images above and below show the progress as I moved my equipment in. Oh, the mistakes I made and have lived with - until now.


I hung a hair light with a grid hung from a boom arm above the shooting area but because of the lower ceiling  the angled boom arm ended up in photos when shooting full length, vertical shots of my subjects. I made other mistakes as well, including how I positioned the key and fill lights in terms of distance from the backdrops (way too close). To make sure that I could use up to a 200mm focal length, I set things up assuming that I would need to position my subjects and key/fill lights close to the backdrops. That kept me from being able to use one backdrop - white seamless paper - when I wanted image backgrounds to look white, black or gray. Had I moved everything further away from the backdrops (key/fill lights and subjects), depending on how I used the key/fill lights and background lights, I could have used just the white backdrop to appear white, gray or black. But, because of the proximity of lights and subjects to the backdrop, light spillover made it impossible to make the white paper look anything but white, and at best, a very light gray. Forget about black. In order to get these colors into the background I had to use a gray or a black backdrop which meant perpetual backdrop changes.


Despite the setup shortcomings, I made the space work. I actually began to appreciate the intimacy of the smaller space but eventually I grew tired of having to photoshop the hairlight boom arm out of images. I finally modified the hairlight setup and placed lights behind and to the left/right of the shooting area with grids and a snoot to backlight hair and separate the subjects from the backdrops (see below).


Before attending Photoshop World, I began a total re-configuration of the lighting equipment at my disposal. All in all, I have the following monolights and light modifiers available for use (along with various reflectors), some of which are shown below after I began to move things around:
  • 4'X7' softbox
  • 60" Octagon softbox
  • 2'X3' softbox
  • 2'X2' softbox
  • 9"X36" strip softbox
  • two 1'X5' strip softboxes
  • Ring Flash
  • 22" Beauty Dish w/diffuser sock
  • 18" Beauty dish w/20 and 40 degree grids & diffuser sock
  • Assorted barn doors, grids and snoots for monolights
  • Various monolights ranging from 1000 watts/sec to 160 watts/sec


One of the most important aspects of re-configuring things was to back everything away from the backdrops. I came to the conclusion that I had enough room to back everything up and still use up to a 200mm lens so my subjects could stand 10' away from the backdrops. That is enough distance to allow me to use the white seamless paper as a backdrop that I can make to look white, gray or black depending on how I use the lights and my desired look. Another benefit is that on the few occasions I opt to use mottled backgrounds, they'll be blurred, something I've had to do in post-processing until now because of the depth of field generated by shooting at f11 (typically my working f stop). But even though I moved things around, I still knew deep down that the studio setup still wasn't totally right.


After returning from Photoshop World and attending classes taught by +Joe McNally+Frank Doorhof+Joel Grimes+Glyn Dewis and others, my instincts were dead on - more changes were necessary to maximize use of the space and my lighting options. I took down the 4'X7' softbox and replaced it with the 18" beauty dish for which I have two grids at my disposal. As so effectively demonstrated by Frank at Photoshop World, a gridded beauty dish provides some great lighting options that I had never used to my advantage even though I had the equipment on hand. After picking up the 22" dish, the 18" version has sat unused even though it was the only one for which I had grids. Now I can switch from one beauty dish to the other, depending on what kind of light I want, since both are in place and ready for use (one has a Bowens mount, the other a Photogenic mount so I can't use the same monolight for both dishes). The same goes for the hardly-ever-used ring flash, which until now I had sitting around rather than on a light stand, ready for use.


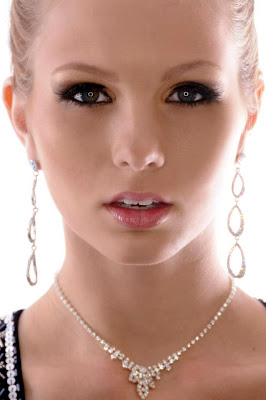
In retrospect, I can't believe I have let the ring flash linger in limbo as I have because it has such a unique lighting characteristic that definitely has a place when mixed in with other lighting setups. When the subject is positioned close to the backdrop, it creates a subtle but dramatic shadow all around the subject, virtually a trademark of Cosmo, Vogue and other high fashion magazine covers for many years (Above, L). It also creates a distinctive, circular catch light in the subject's eyes which I think is mucho-wow (Above, R).


Now that I've taken down the 4'X7' softbox from the monolight at camera left, it is now available at a moment's notice to position behind my subjects and used as a lit backdrop. Because of how cumbersome it is to put up and take down, I have resisted using it in this manner even though this technique generates some amazing images (above). When positioned behind a subject and metered properly, the light given off by the softbox wraps around a subject evenly from the rear, creating a soft wash of light that is spectacular. In conjunction with a beauty dish set up above the shooting position and angled downward at 45 degrees to the subject, the lighting rocks. I was turned on to this technique by +Scott Kelby after seeing an image he created using the above technique and reading his description as to how he shot it. My only deviation in the image above was to use add my 2'X2' softbox at floor level, angled upward towards the subject's neck, creating a clamshell type of lighting. Scott used a reflector to fill in the shadow below his subject's chin but I wanted less shadow so I went with another light.


I finally devised a way to hang two lights directly above/slightly behind subjects to serve as hairlights. First I had to replace the overhanging, always-in-the-way, superfluous ceiling fan with a flush mount light fixture. I then used two background support stands to run a 10' section of 1 1/2"  diameter pipe overhead.With light clamps attached to the pipe, I hung two 160 w/sec monolights. One of the lights is fitted with a 20 degree grid to tighten the light. Barn doors are also attached so I can fine tune the direction of the light. The other monolight is fitted with a snoot for very tight, focused light.

Two other steps in the re-work of the studio came thanks to a blog post by +Zack Arias. In the post, Zack describes and illustrates how he sets up a semi-permanent white backdrop sweep using white seamless paper for the background with two sheets of  "white board" serving as the surface on which subjects stand/sit. I've followed Zack's advice and now have a much improved shooting area (above). White board is available in 4'X8' sheets at any Home Depot or Lowe's for $12 bucks a sheet. It is nothing but 3/16" thick masonite with one surface having a somewhat glossy white finish that not only reflects light, it also reflects the subject in a very desirable manner. Another benefit is that the all-too-unavoidable dark smudges left by shoes on white seamless paper don't seem to result, at least not as noticeably, when walking on the white board. Instead of having to constantly pull more paper down and cut off the smudges during/after a shoot, what little smudging is created can be quickly cleaned up almost entirely after a shoot.

The other tip Zack provided is using a pair of 30" bi-fold doors ($35 bucks each at Home Depot) to provide a versatile gobo for background lights. After buying these bad boys, I discovered that the doors also serve as a great surface to attach 4'X8' sheets of foam core for use as side, fill light reflectors. I did as Zack suggested and painted the facing surface of the bi-fold doors flat black, but since I'm using the foam core sheets as fill reflectors, I did not do as he suggested and paint the opposite side with a semi-gloss white paint to serve as side fill. If I ever want to use the doors in this manner I can always paint them later on, but for now, I think the foam core will be just the ticket.

Photo courtesy of F.J. Westcott Co.
Photo courtesy of Ardinbir Studio


The cherry on top of my studio re-work is the addition of two types of light modifiers (above). +Joe McNally introduced me to the world of the 7' parabolic, shoot through umbrella (L) during his Photoshop World pre-con session. Using this baby in a one-light setup directly in front of the subject generates a gorgeous, soft light as Joe showed us. If and when I need to use a second large light modifier as fill light (in addition to the 60" octagon softbox) or as an option to my 60" octagon softbox, the Westcott 7' shoot through umbrella is incredible.

In order to create the oh-so-cool rim lighting technique used by +Joel Grimes, or to add dramatic side lighting on subjects, Joel turned me on to the virtue of gridded, strip softboxes. Using two gridded strip softboxes set up behind or to side of subjects, one on each side, opens up a whole new lighting world that I can't wait to explore.

I ordered all of the above and just learned that they have arrived, waiting for me to take to the studio after I return home from my current out of town trip.


I've been very fortunate to have had the luxury of photographing subjects who have made it virtually impossible for me not to have capture images that, despite my set up mistakes, allowed me to dodge many bullets in terms of the final product. Despite not having taken full advantage of my lights and modifiers, my subjects have saved the day. With the changes I've made, I hope to be able to generate even better images in the future.